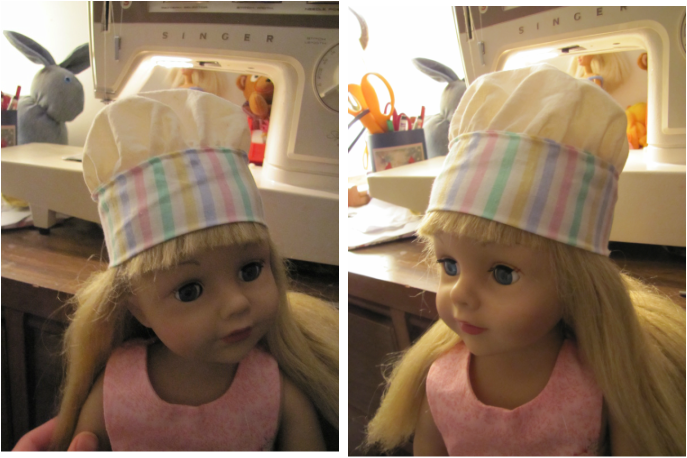
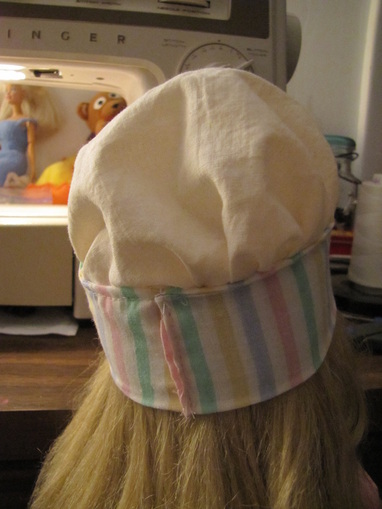
Easy AG Chef's hat

More coming soon
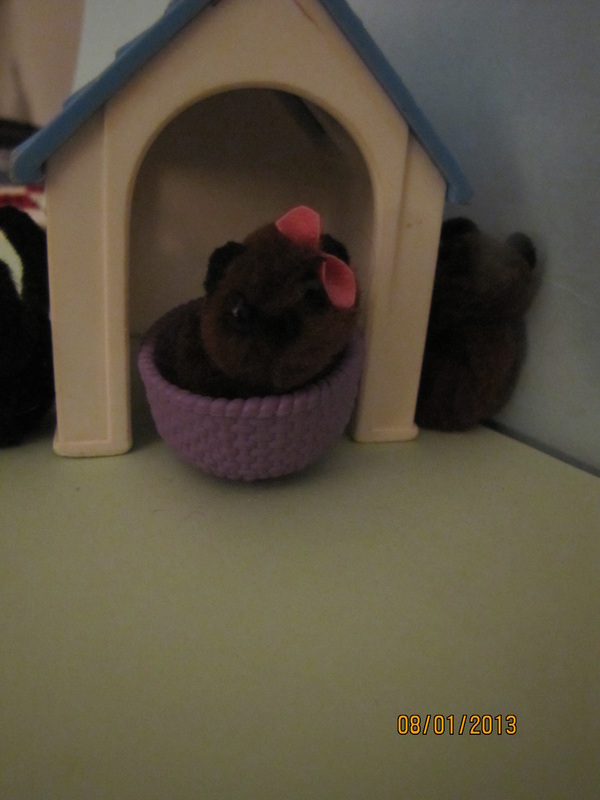
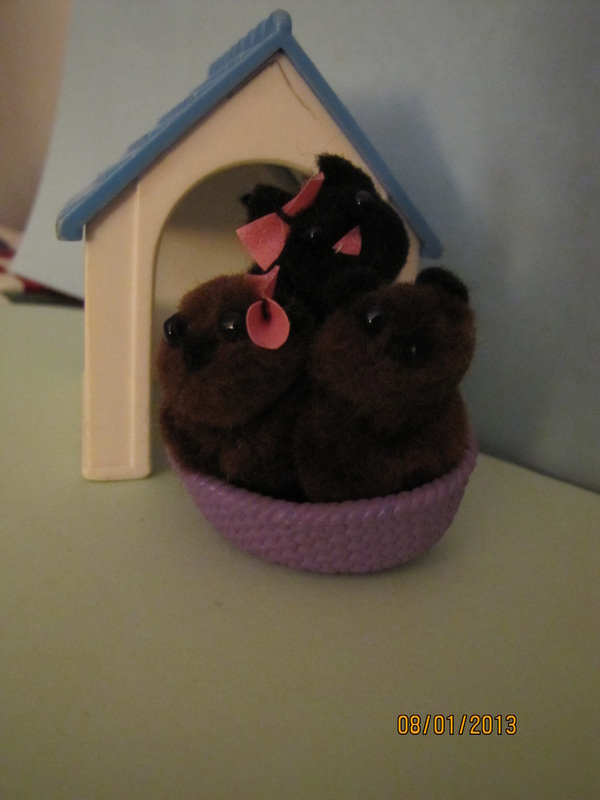
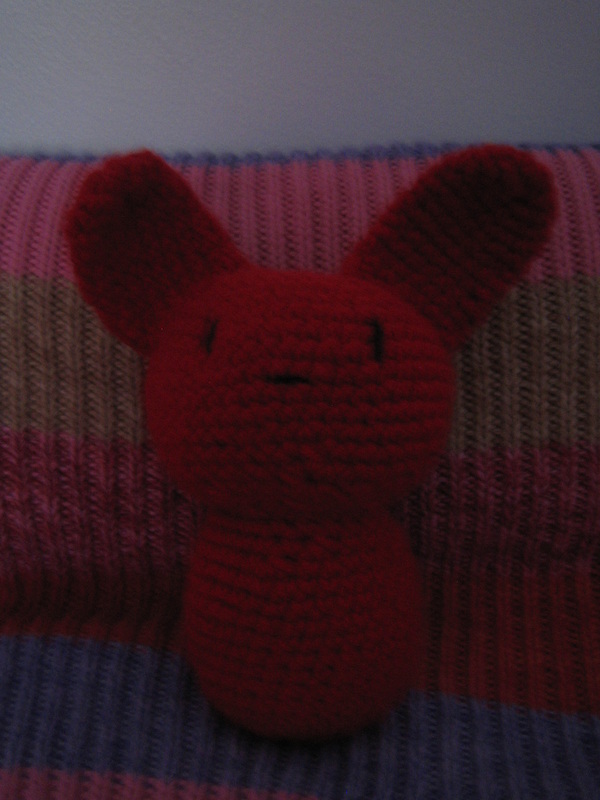
Craft of the month Oct and Nov
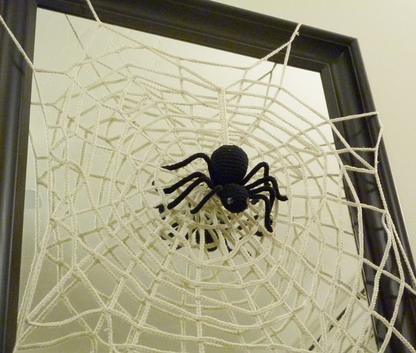
I got the pattern from http://www.yanaknits.com/projects/halloween-spider/
The spider’s body is made in one piece. The legs are knitted as I-cords and attached to the bottom of the spider.
Spider’s Body
Chain 3, join with a slip stitch
- Round 1 (increase 3): SCx2 into every stitch (=6 st total)
- Round 2 (increase 6): SCx2 into every stitch (=12 st total)
- Round 3 (increase 6): SCx2 into every other stitch (=18 st total)
- Round 4 (increase 3): [SC5, SCx2 into the next stitch] 3 times (=21 st total)
- Rounds 5-8: SC all stitches
- Round 9 (reduce 3): [SC6, skip 1] 3 times (=18 st total)
- Round 10 (reduce 5): skip 1, [SC3, skip 1] 4 times, SC1 (=13 st total)
- Round 11 (reduce 5): [skip 1, SC2] 4 times, skip 1 (=8 st total)
- Round 12: SC all stitches
- Round 13 (increase 8): SCx2 into every stitch (=16 st total)
- Round 14 (increase 4): [SC3, SCx2 into the next stitch] 4 times (=20 st total)
- Round 15: SC all stitches
- Round 16 (increase 4): [SC4, SCx2 into the next stitch] 4 times (=24 st total)
- Round 17 (increase 4): [SC5, SCx2 into the next stitch] 4 times (=28 st total)
- Rounds 18-21: SC all stitches
- Round 22 (reduce 4): [skip 1, SC6] 4 times (=24 st total)
- Round 23: SC all stitches
- Round 24 (reduce 6): [skip 1, SC3] 6 times (=18 st total)
- Round 25 (reduce 6): [skip 1, SC2] 6 times (=12 st total)
- Round 26 (reduce 6): [skip 1, SC1] 6 times (=6 st total)
- Round 24 (reduce 3): [skip 1, SC1] 3 times
Spider’s Legs
The legs are knitted as I-cords. Cast on 4 stitches using double-pointed needles and make 1 I-cord 12 inches long for the back legs, 2 I-cords 11 inches long for the middle legs, and 1 I-cord 10 inches long for the front legs. Insert flexible wire inside the I-cords and sew the ends closed. Sew the legs to the neck/belly of the spider’s body, then bend them to any shape you like
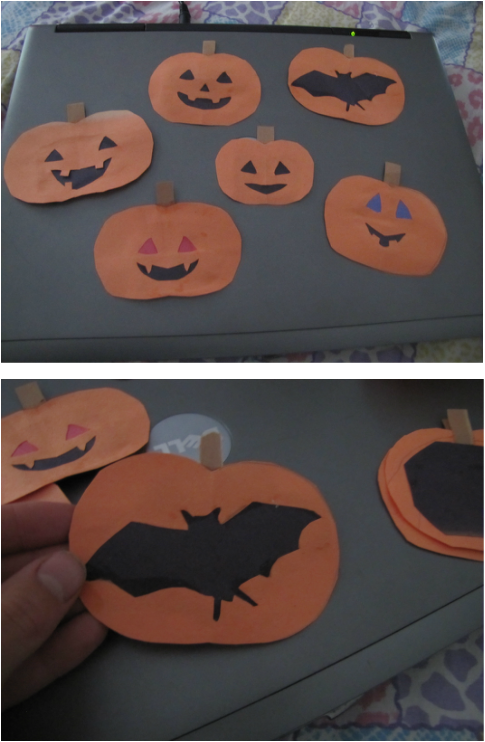
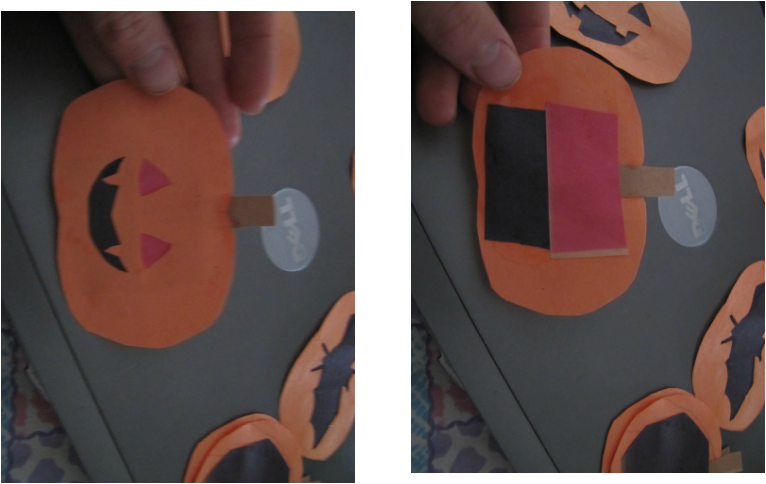
Paper Jack o lanterns is one of the many Halloween/Fall decorations you can make with paper and it's so easy the kids can make
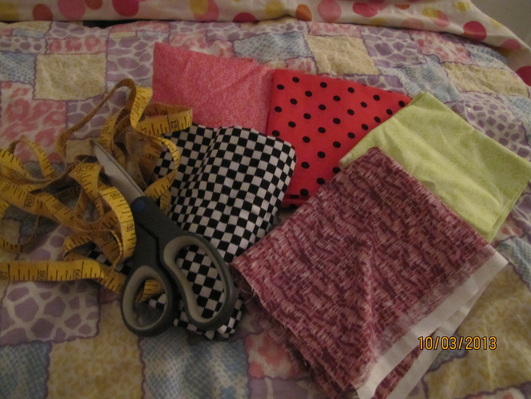
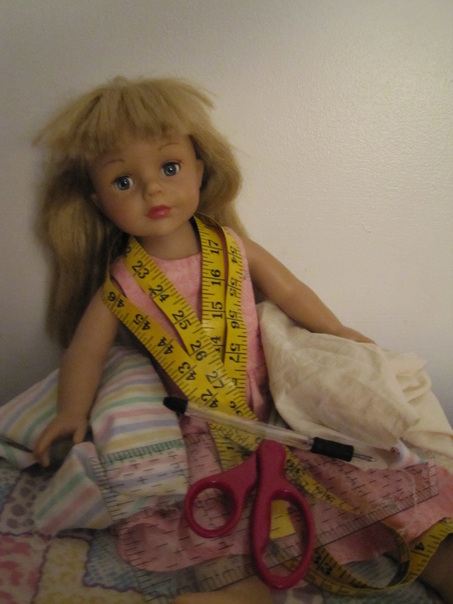
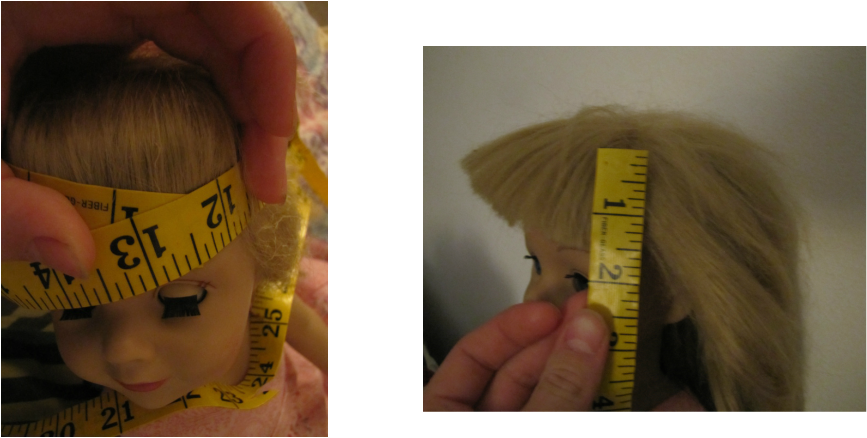
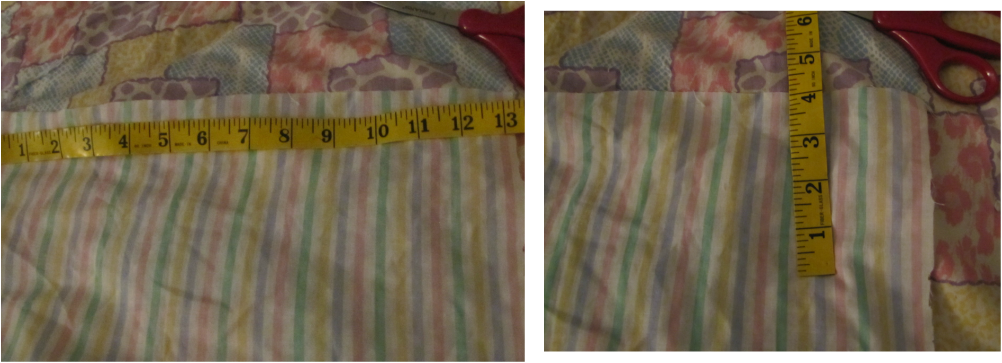
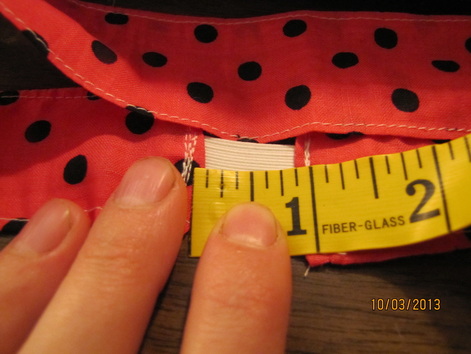
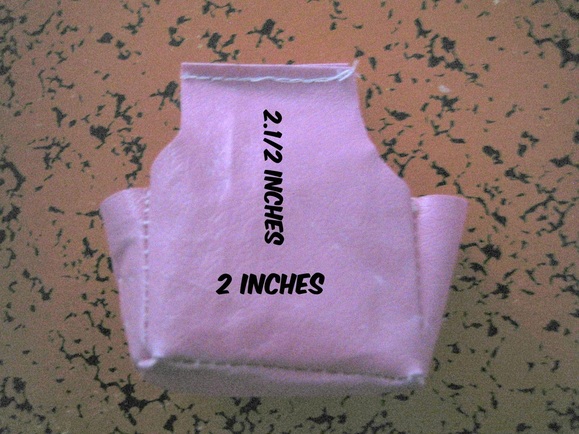
Pick your fabric color you will also need scissors and a measuring tape.
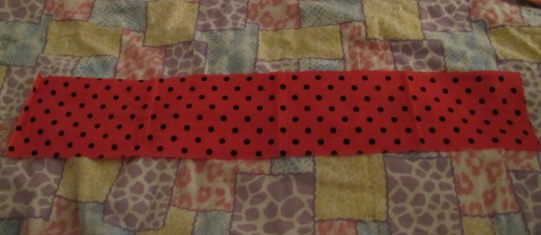
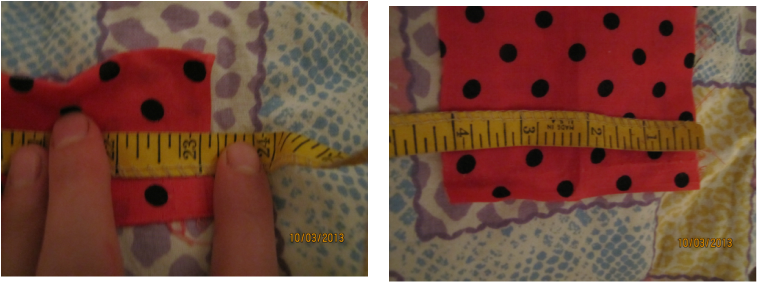
Make a rectangle 23'' X 4'' inches
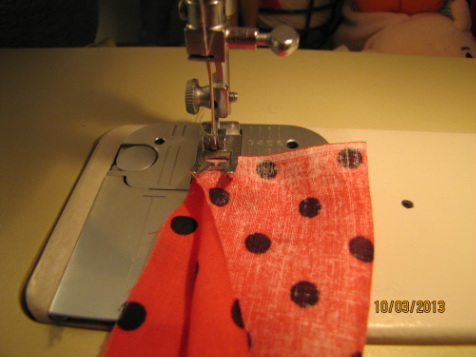
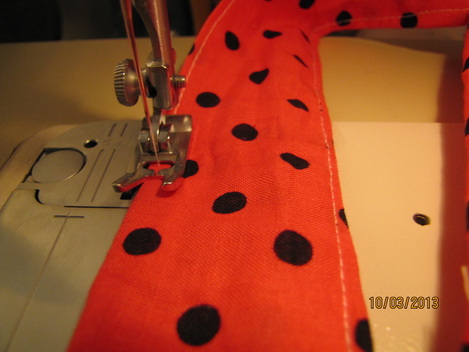
Fold the fabric in half, right sides together.
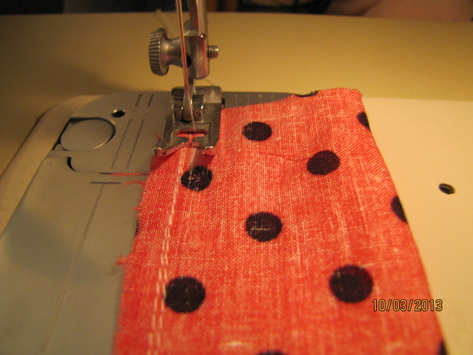
Then sew all the way down, keeping the both ends open.
Put inside out.
Put inside out.
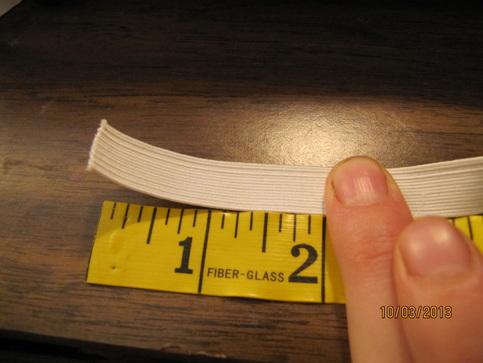
Measure a 2'' inch piece of elastic
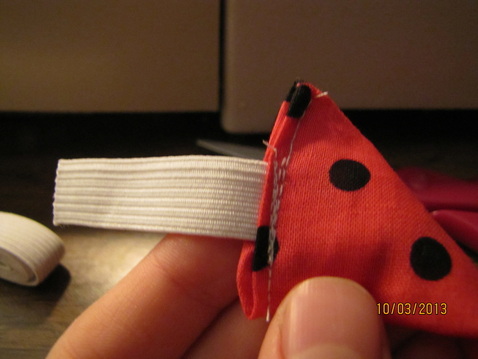
Sew the elastic to both ends of your headband
Sew over the elastic a few times
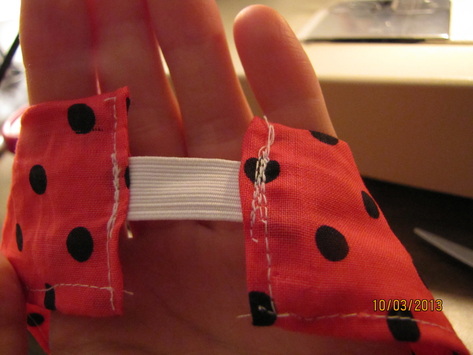
Sew both sides, to flatten it down.
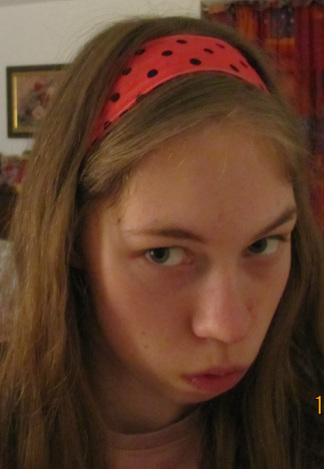
And there you go
A stylish but cute headband that you can make your self out of any color fabric
_________________________________________________________________________________________
Craft of the month Sept
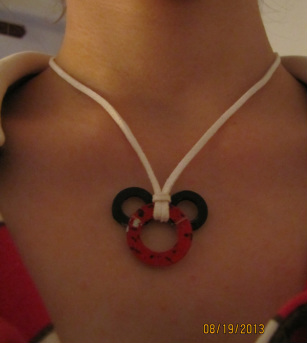
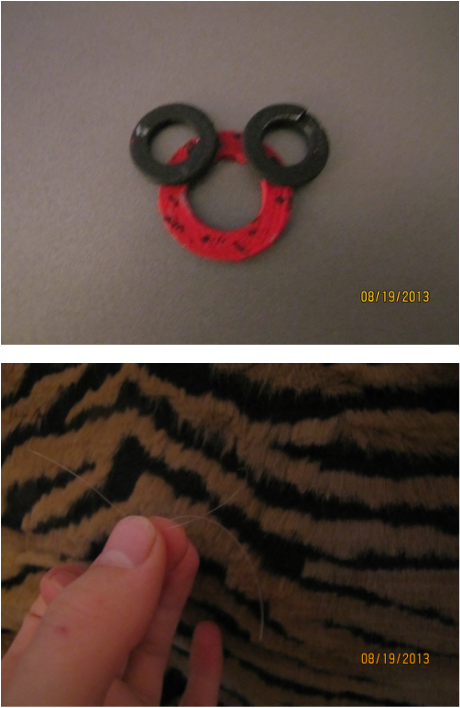
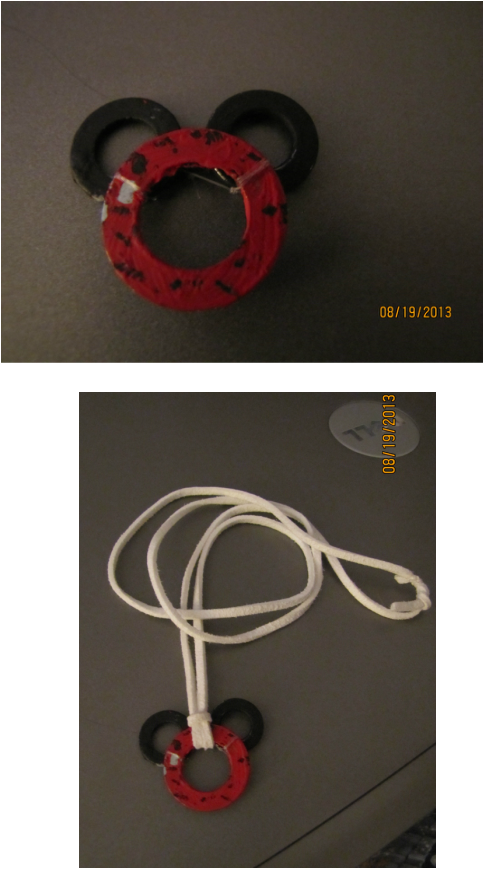
Mickey mouse washer necklace tutorial
1st start with 2 small washers & 1 larger one, I am not sure what size, but it's not that hard to find out.
Then paint your 2 small washers Black on both sized & the bigger on Red you can paint little black dots, but that's just what i did.
After you painted your washers and left them to dry, Take craft string or you could even use red sewing thread. (i used fishing line) after the neck breaking tying. (i think tying the ears on to the head is the hardest)
Ok here comes the best part. I used white leather necklace string. Make sure that you make the string long so you can put it over your head.
~ And there you go a really cute Mickey mouse washer necklace ~
Craft of the month Aug
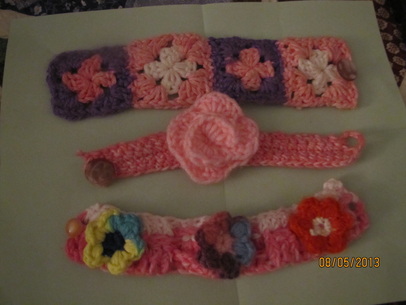
Crocheted bracelet patterns
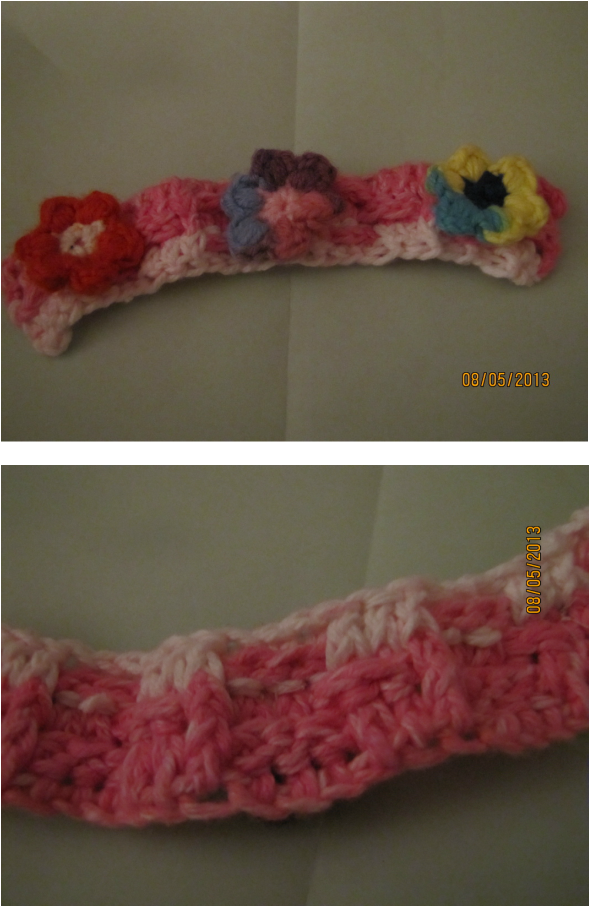
The bracelet is made from the basket stitch. the flowers
[Here is the pattern] http://littlegreen.typepad.com/romansock/2009/04/mollie-flowers-the-tutorial.html
[Here is the pattern] http://littlegreen.typepad.com/romansock/2009/04/mollie-flowers-the-tutorial.html
The bracelet is a sc crochet, i think i sc crochet 4 rows and before you cut the yarn, ch 4 and sl st for the button loop
[The Rose pattern] http://www.crochetspot.com/crochet-flower-pattern-rose/
[The Rose pattern] http://www.crochetspot.com/crochet-flower-pattern-rose/
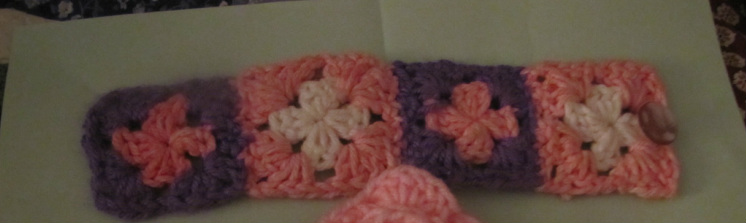
The bracelet are made from mini granny squares
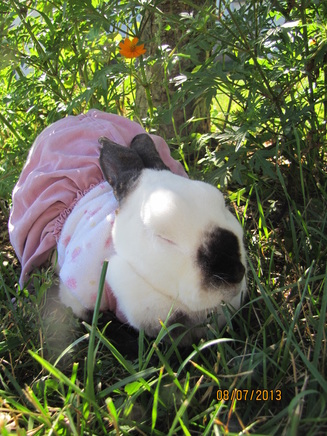
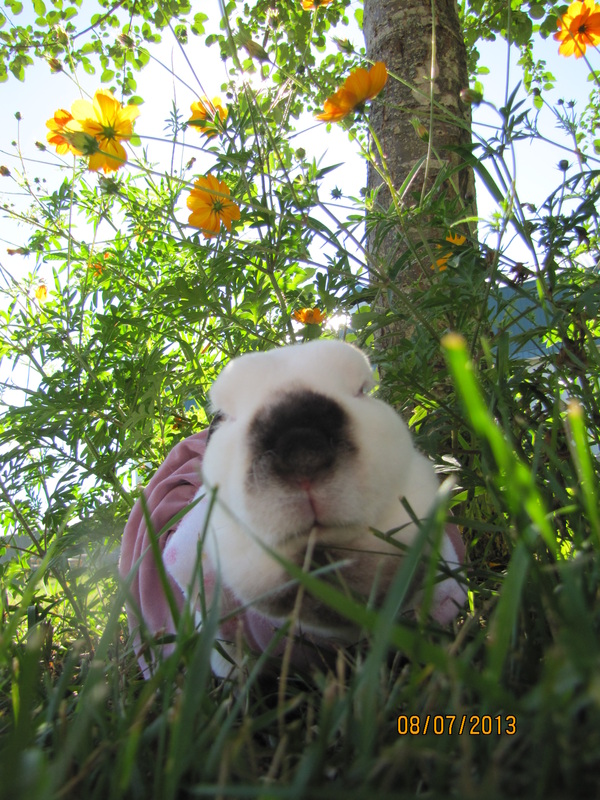
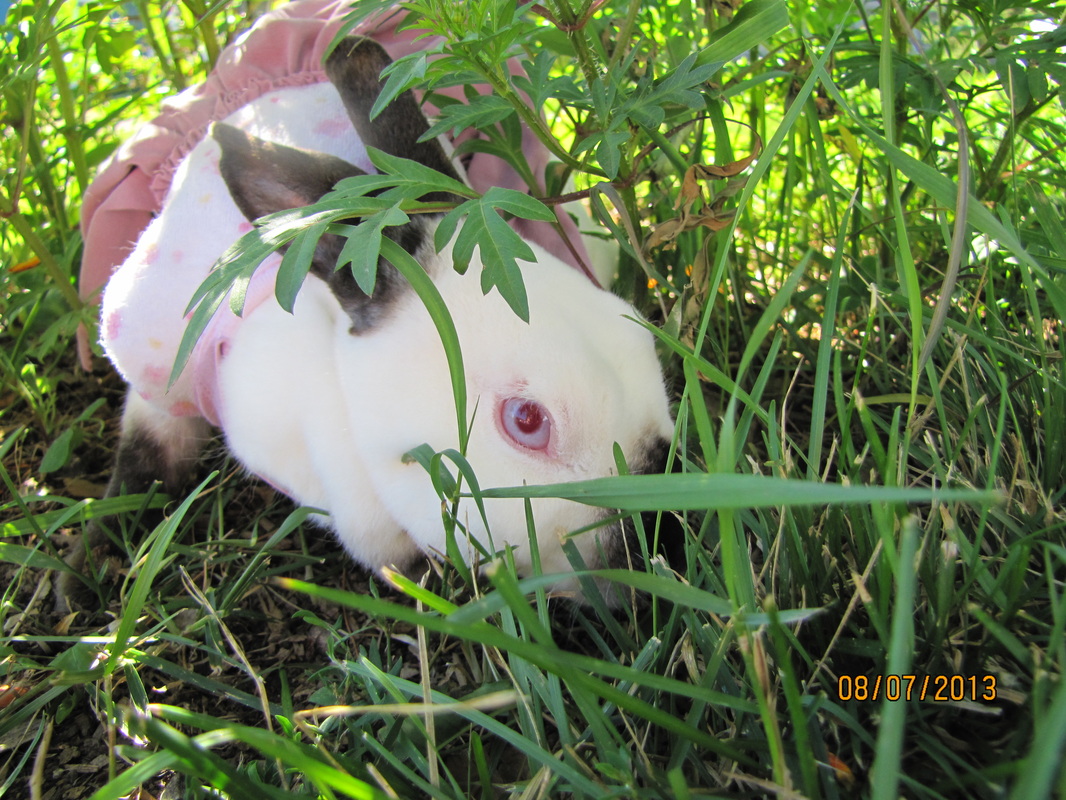
On Aug 6.
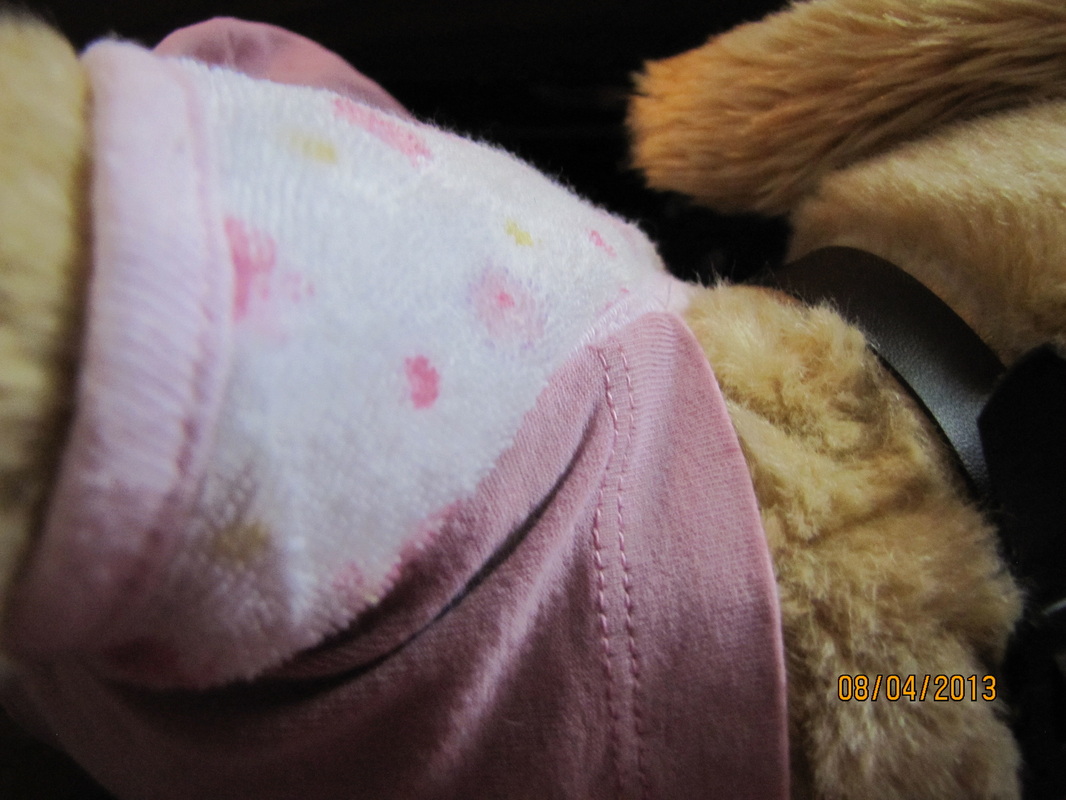
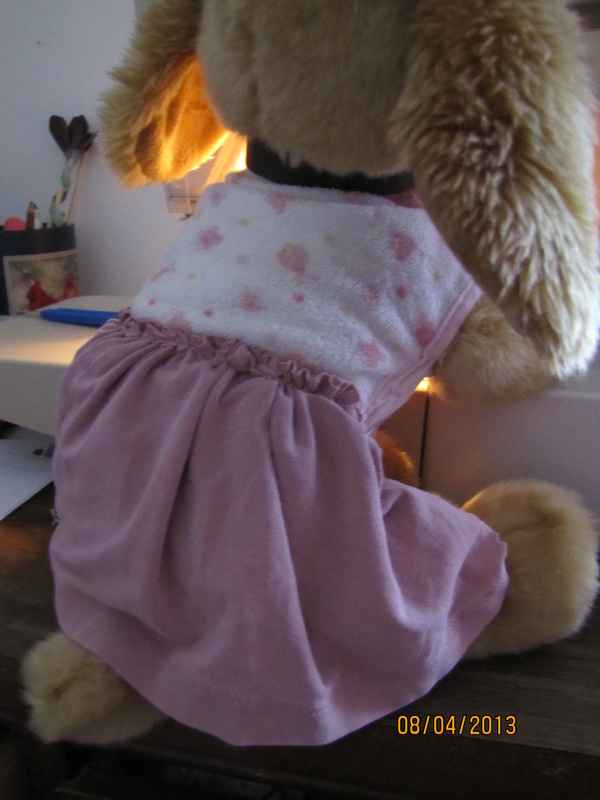
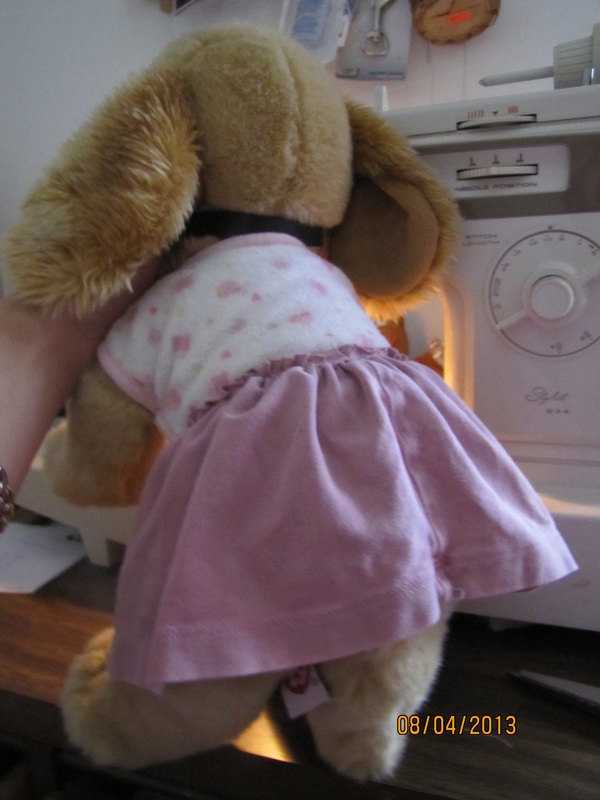
It's my bunny; Cherry's 3th birthday
and i made her a birthday dress
It's my bunny; Cherry's 3th birthday
and i made her a birthday dress

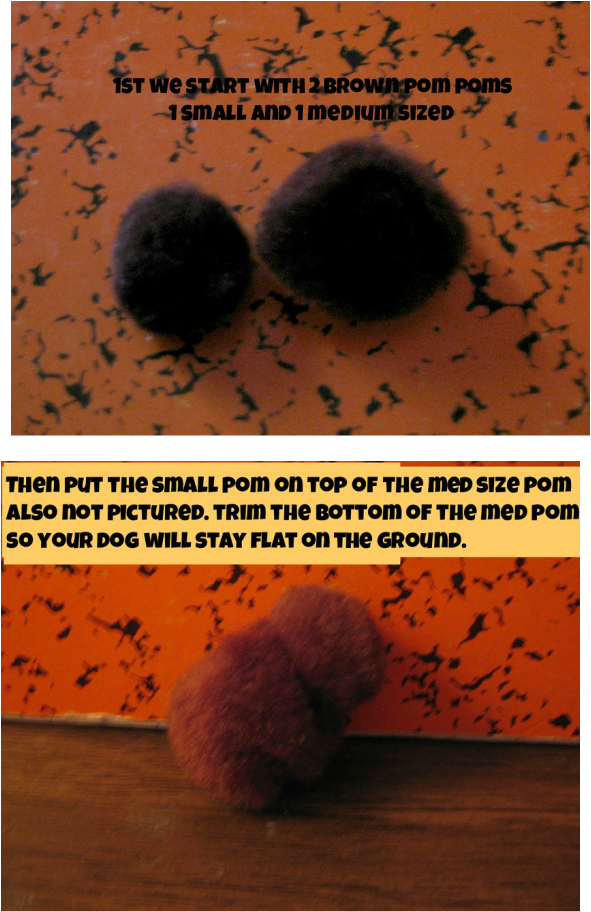
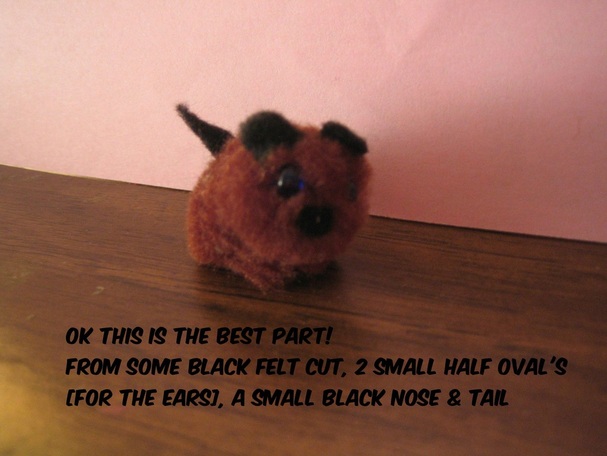
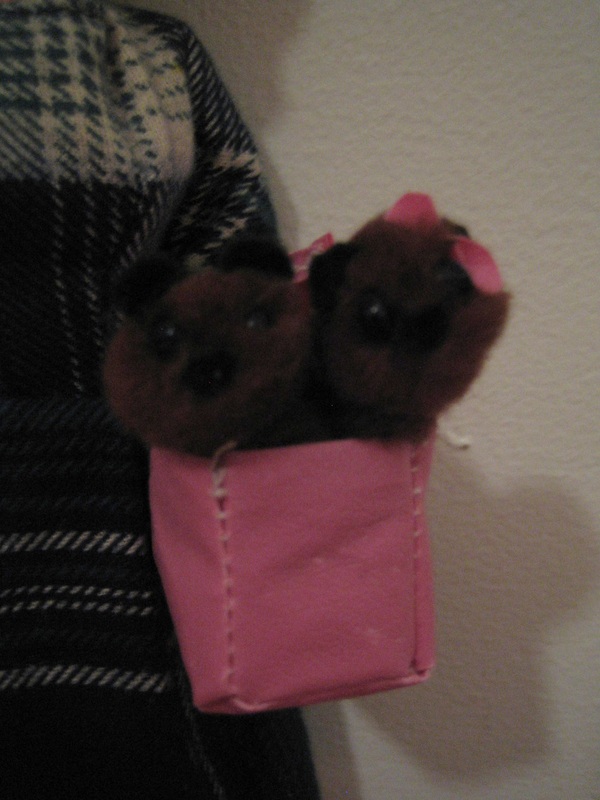
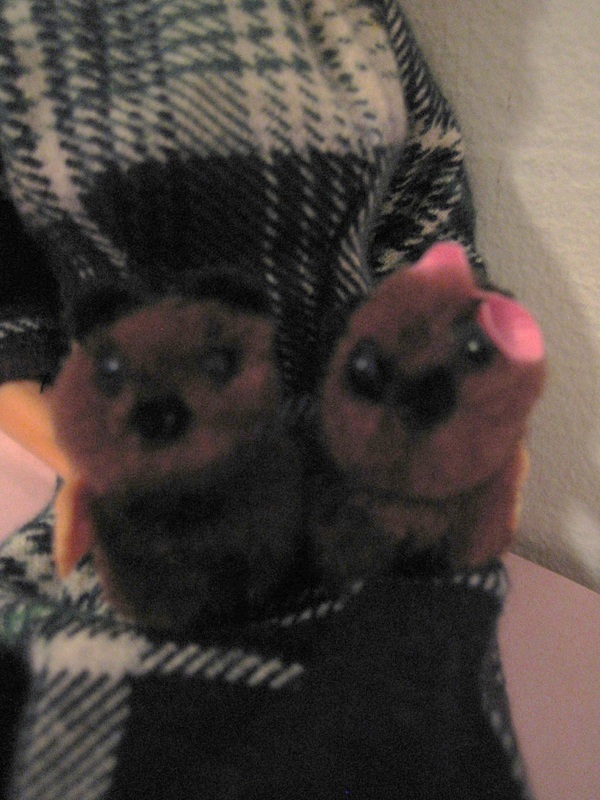
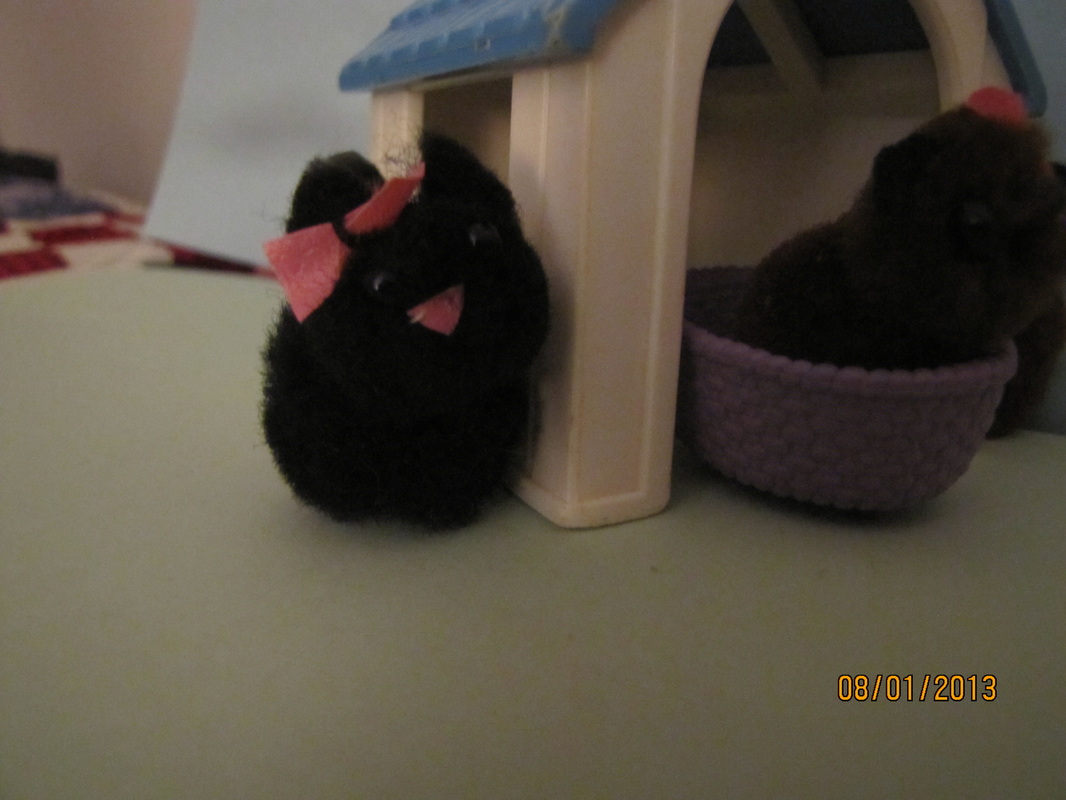
Craft for the month of June-July
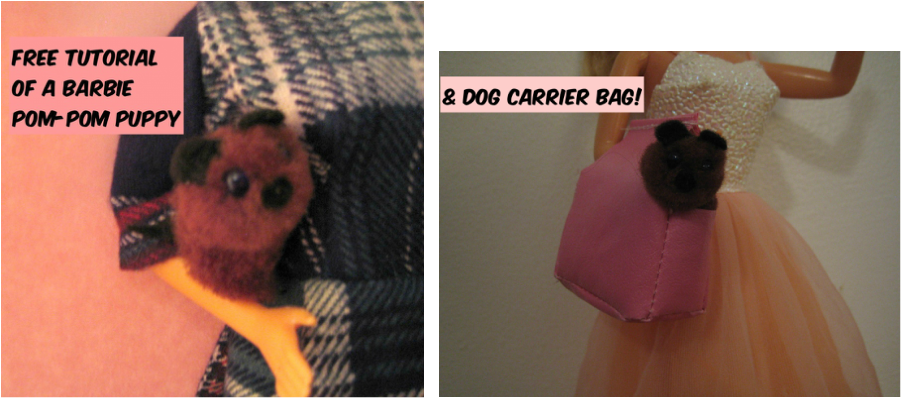
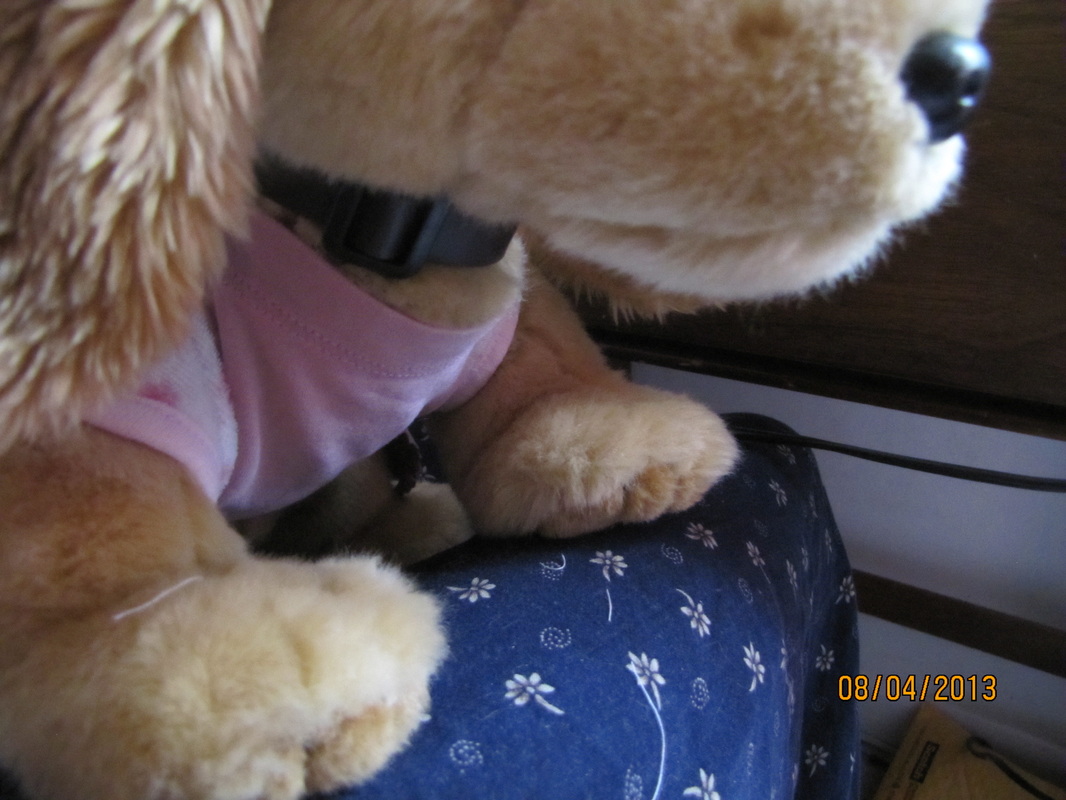
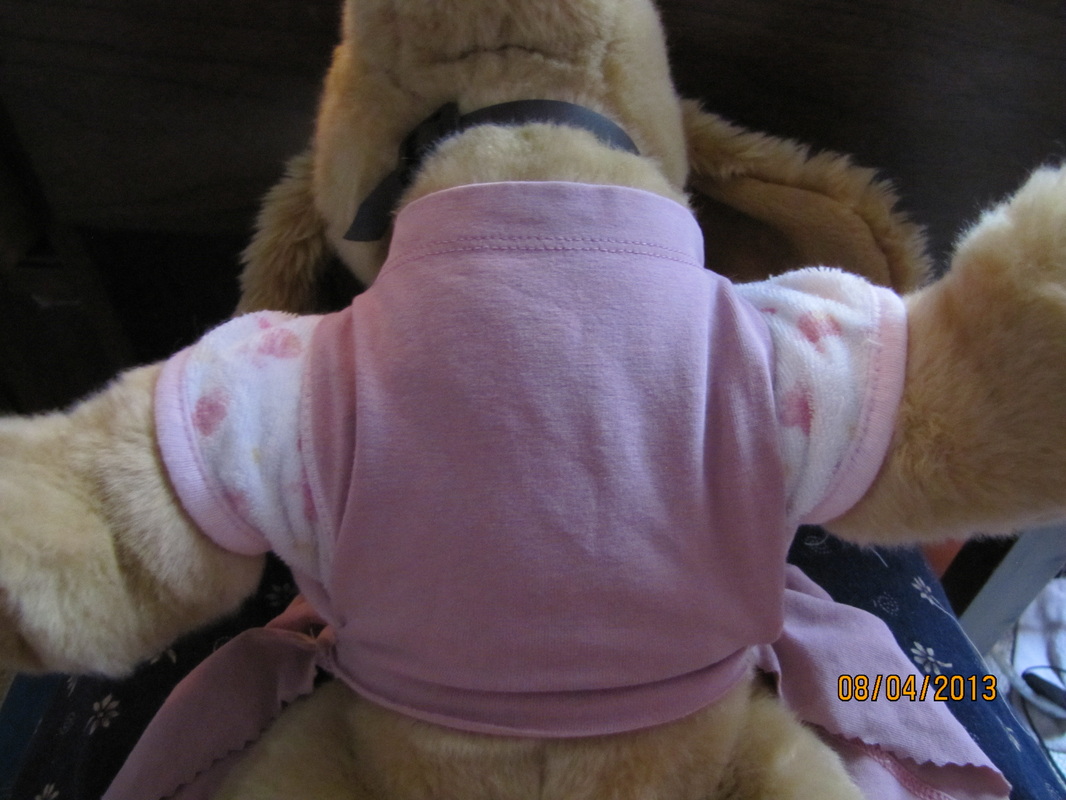
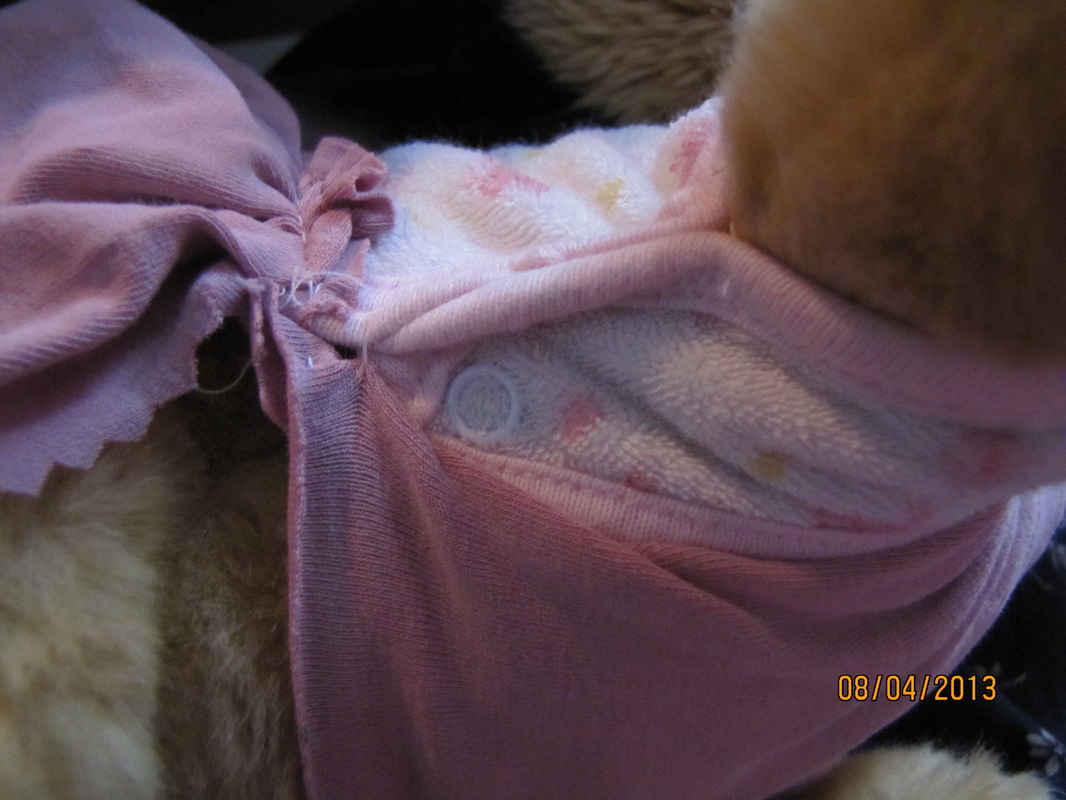
Pom-Pom puppies tutorial
Sorry about the blurry pic's, i really need a new camera
Any problems with the pattern or tutorials; Email me [email protected]
Any problems with the pattern or tutorials; Email me [email protected]
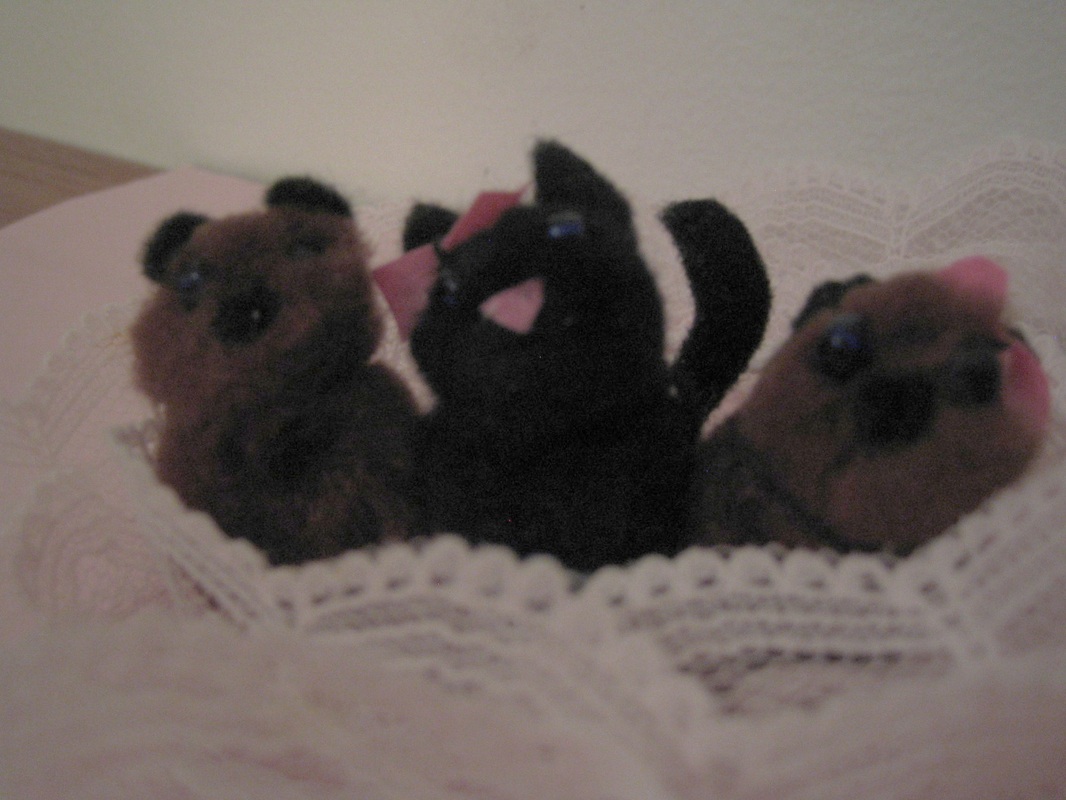

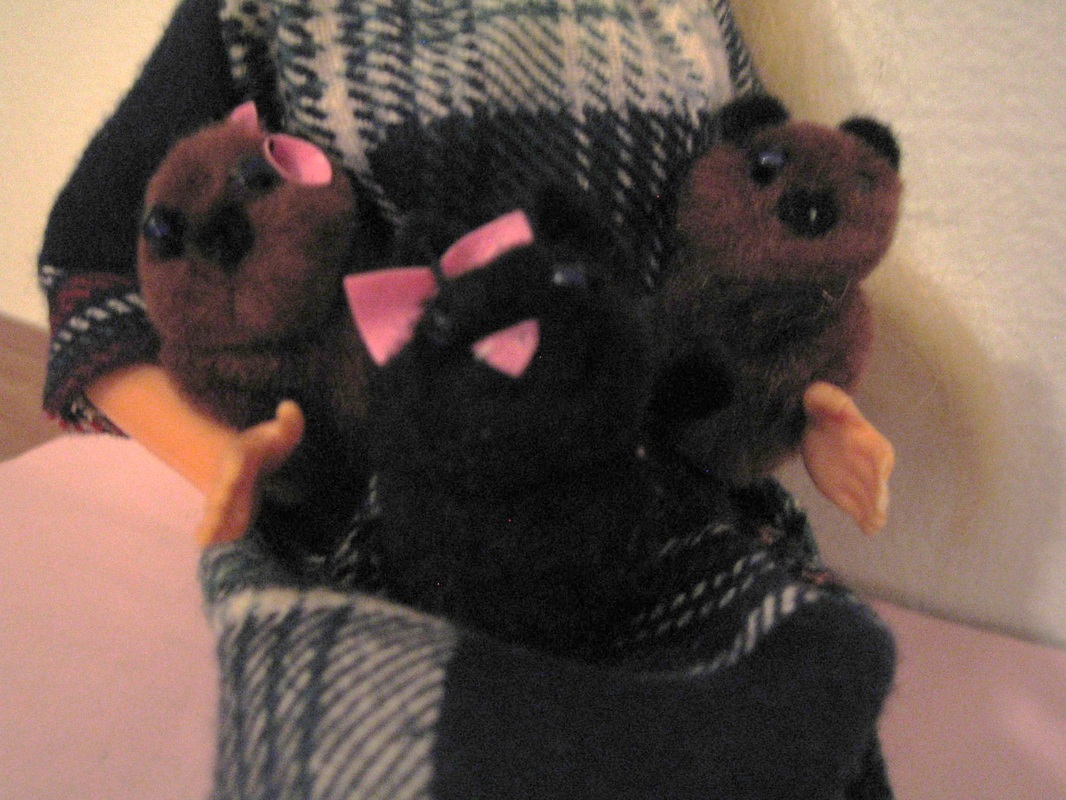

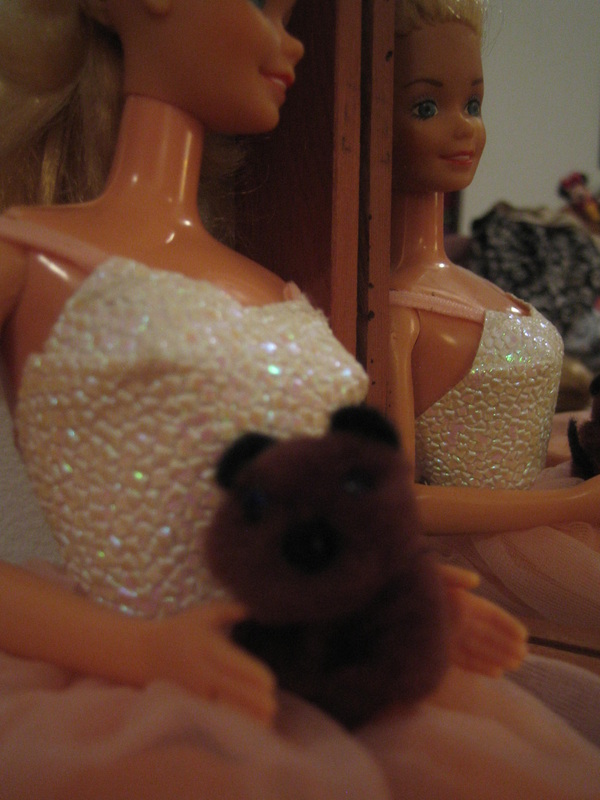
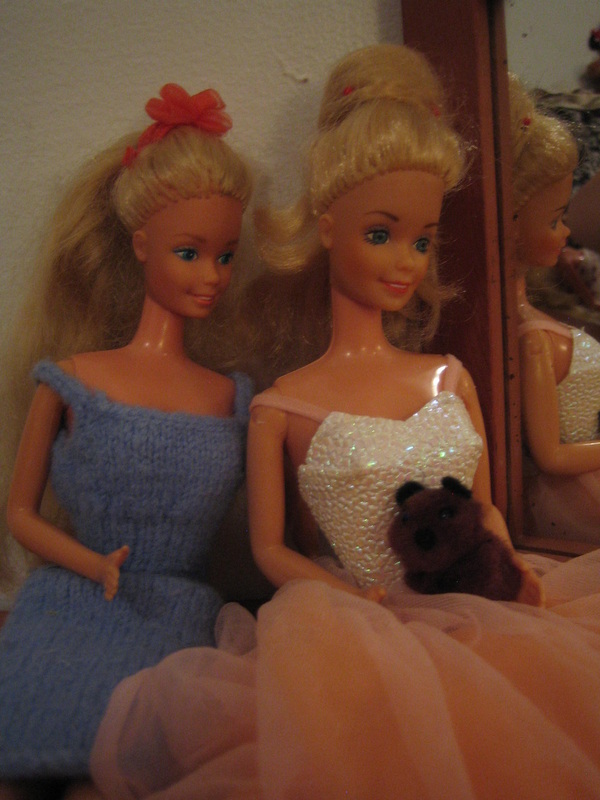
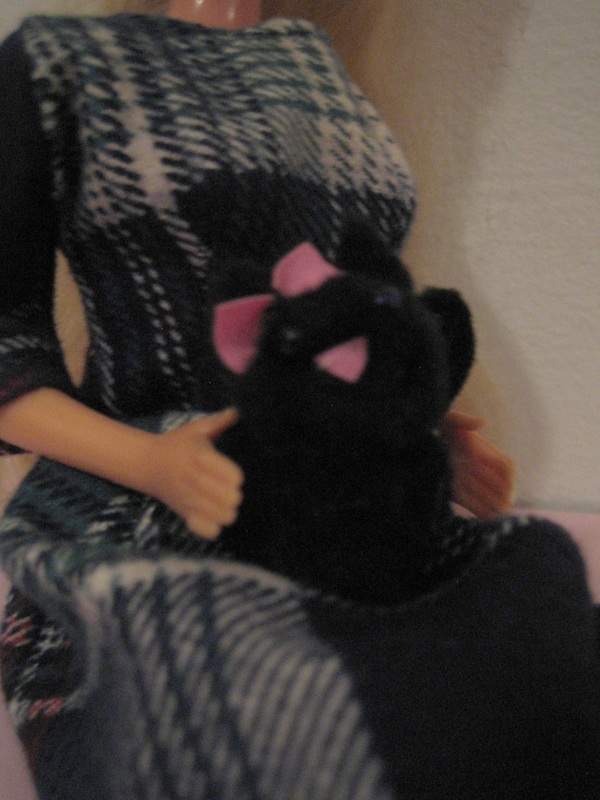
And voila there you go a really cute and easy pom-pom puppy!
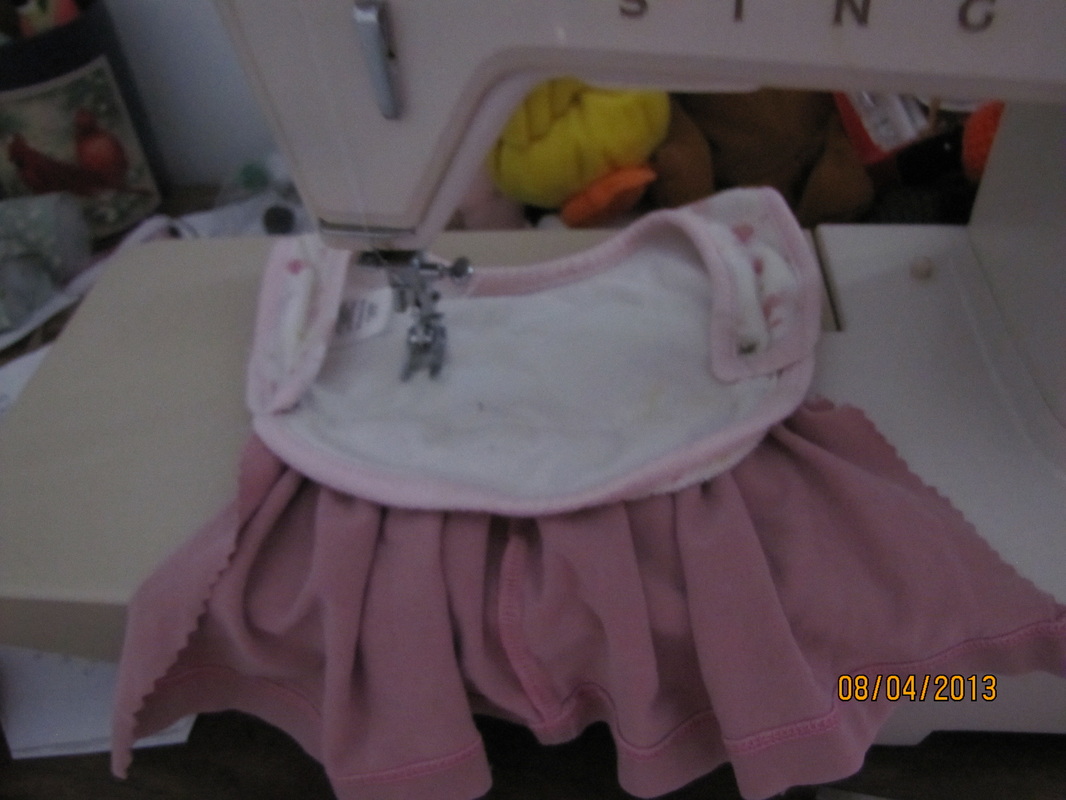
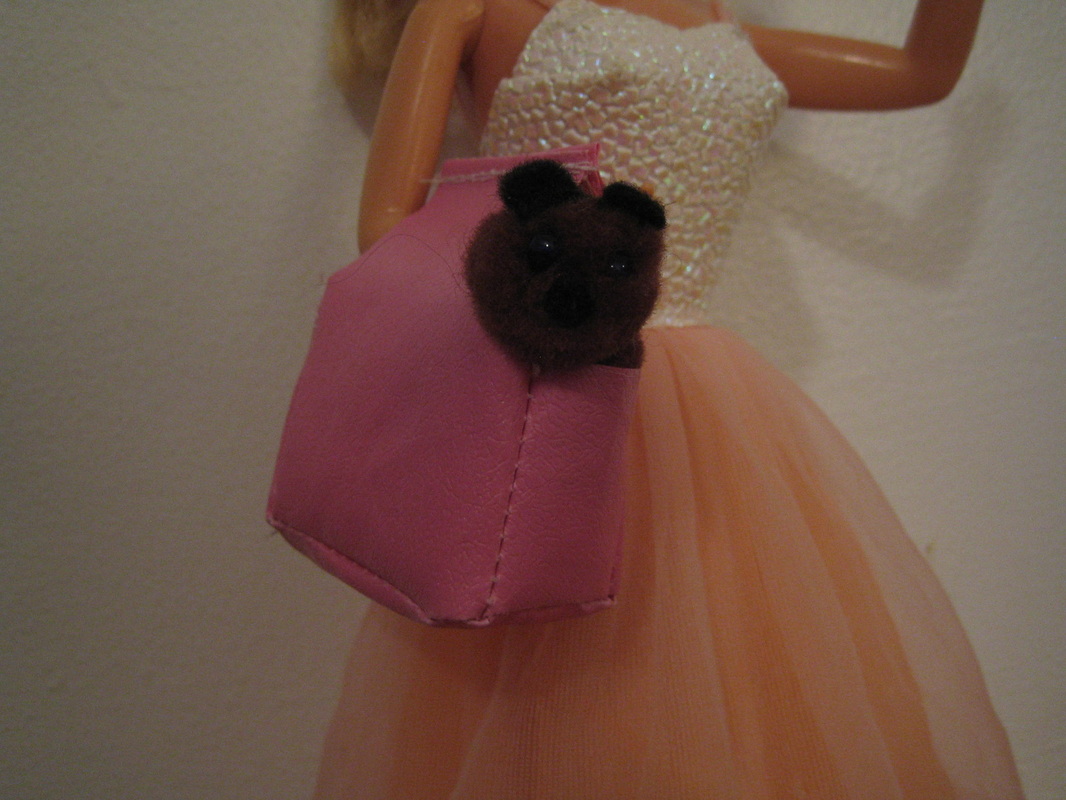
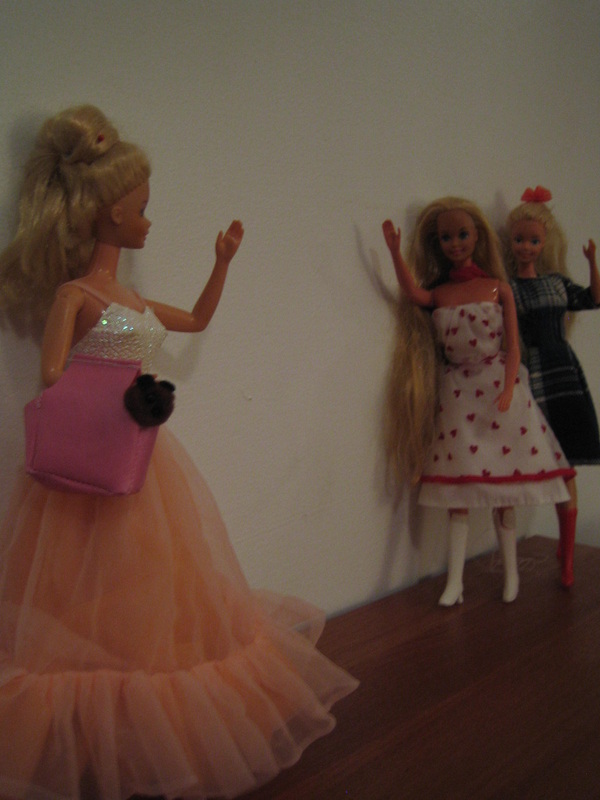
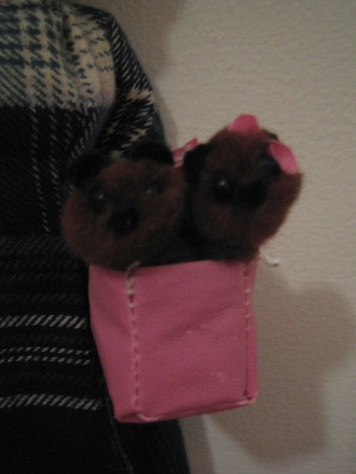
But wait barbie just can have a dog folping around, she needs a pink fashionable carrier bag for her little pooch!
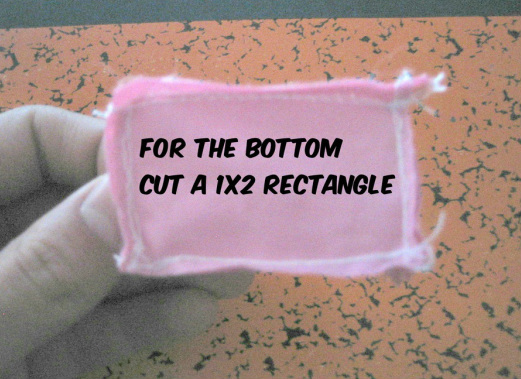
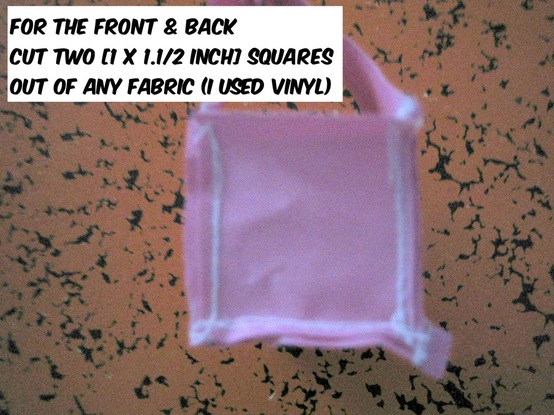
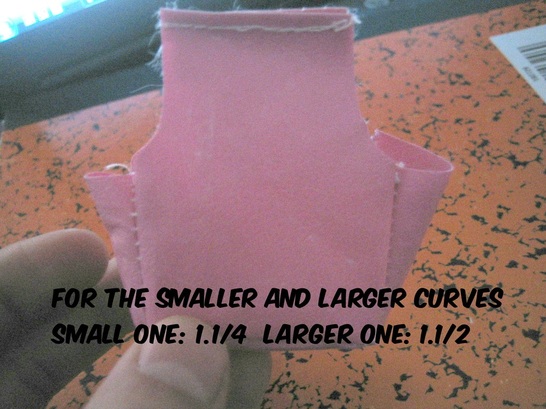
Easy Puppy Carrier Bag
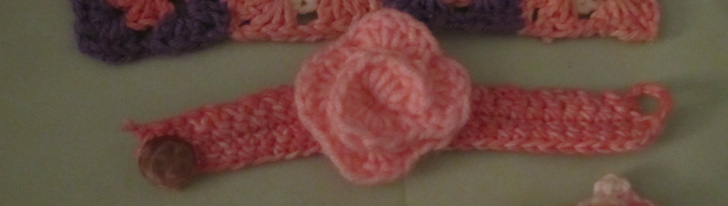
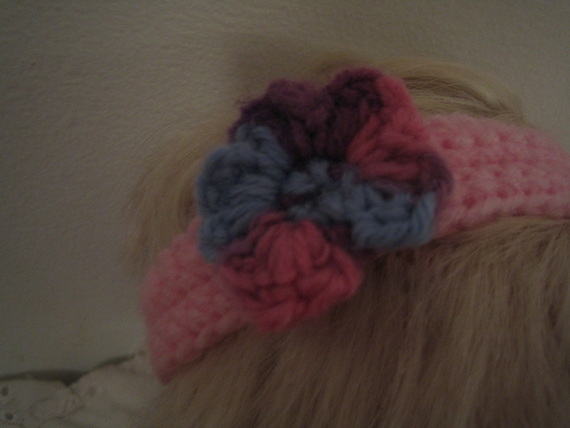
Craft for the month of April-May 2013
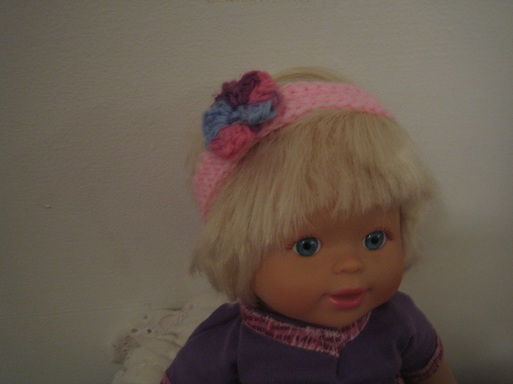
A cute crocheted headband with a crochet flower
_________________________________________
~ Headband ~
Ch 46, Sc 4 rows. Cut yarn and fold in half, sew or crochet together.
~ Flower ~
Ch 5, sc in the 4th ch from the hook. to form a ring
Row: sc 5 st's, * Dc 5 st's in the same place, sl st, ch 1 rep from *
_________________________________________
~ Headband ~
Ch 46, Sc 4 rows. Cut yarn and fold in half, sew or crochet together.
~ Flower ~
Ch 5, sc in the 4th ch from the hook. to form a ring
Row: sc 5 st's, * Dc 5 st's in the same place, sl st, ch 1 rep from *
Any problems with the pattern; Email me [email protected]
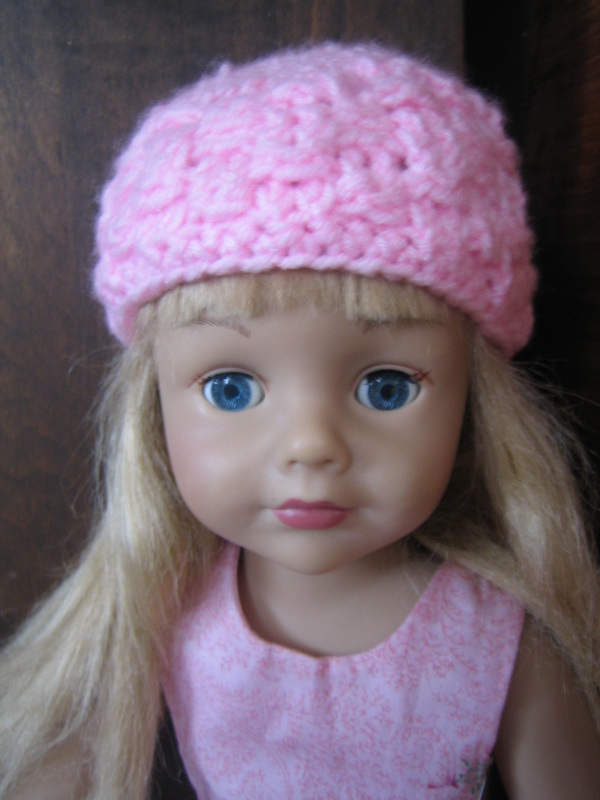
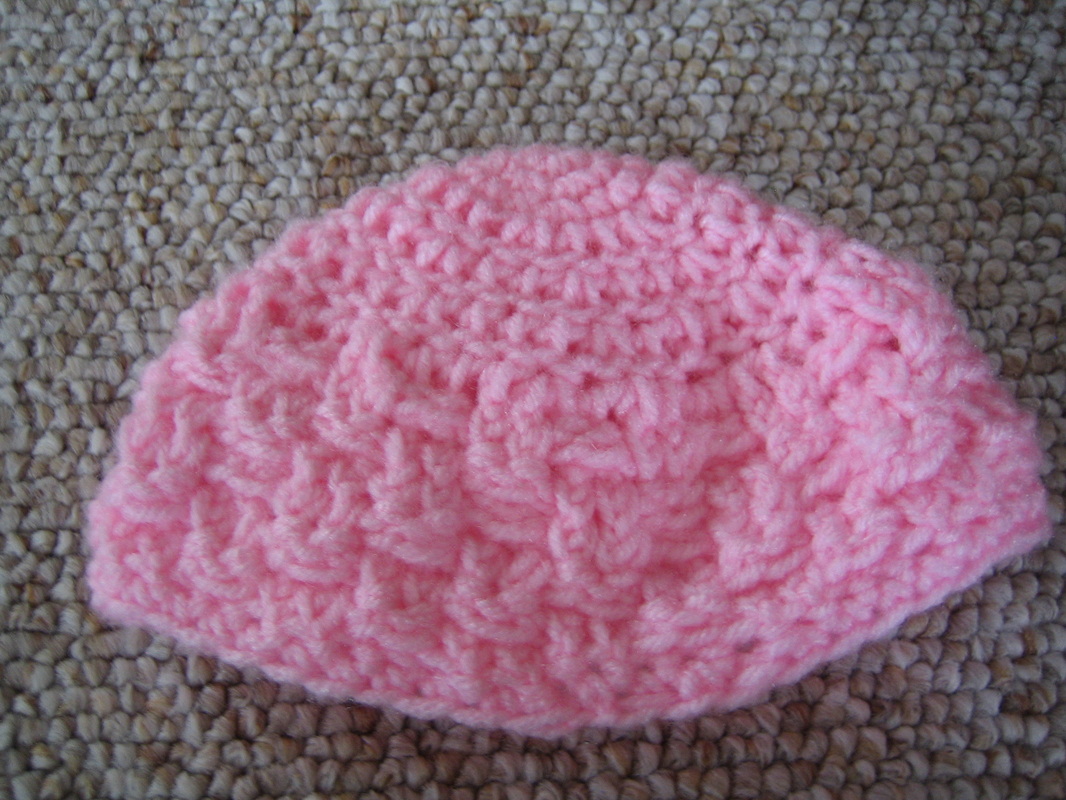
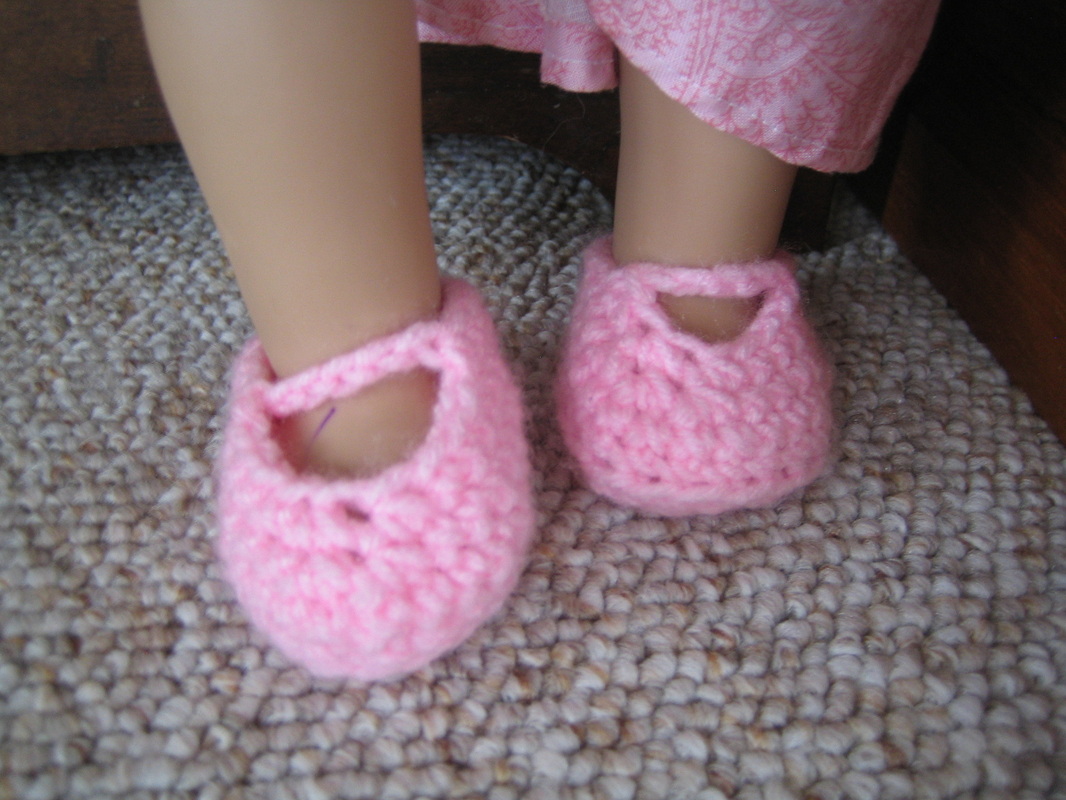
Craft for the month of Feb & March 2013

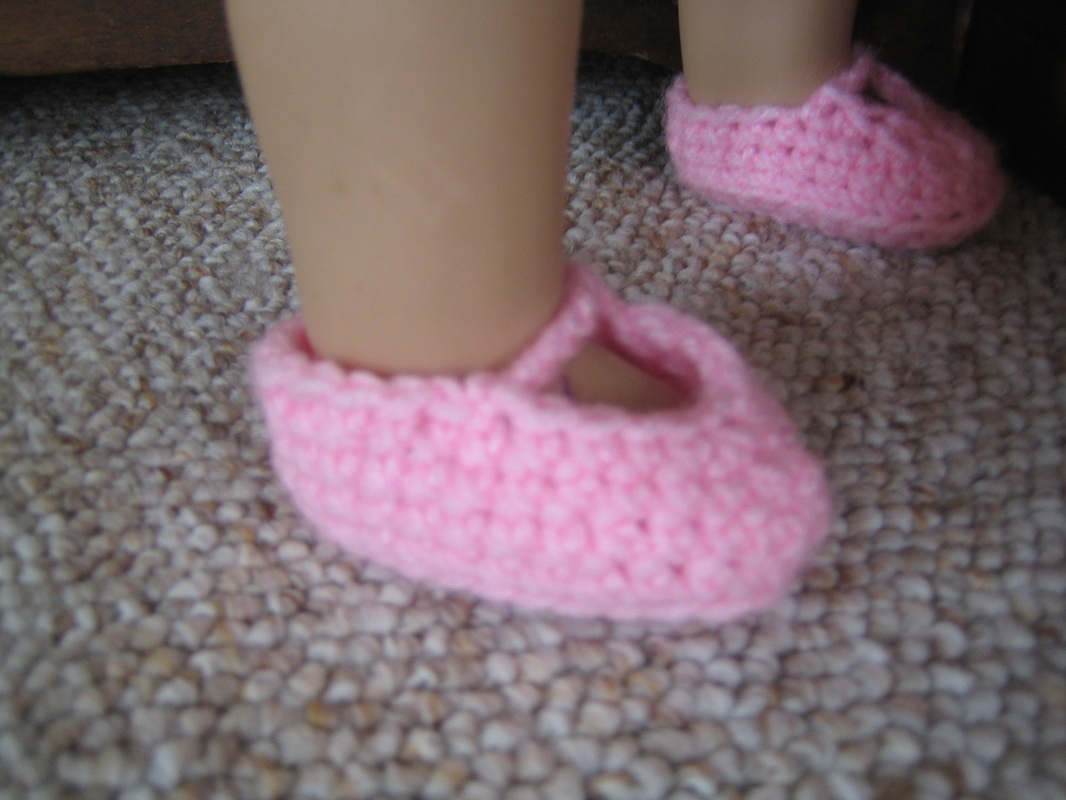
Pink Basket weave hat (for 18'' doll) & Pink shoes
Pink and Red Bunnies
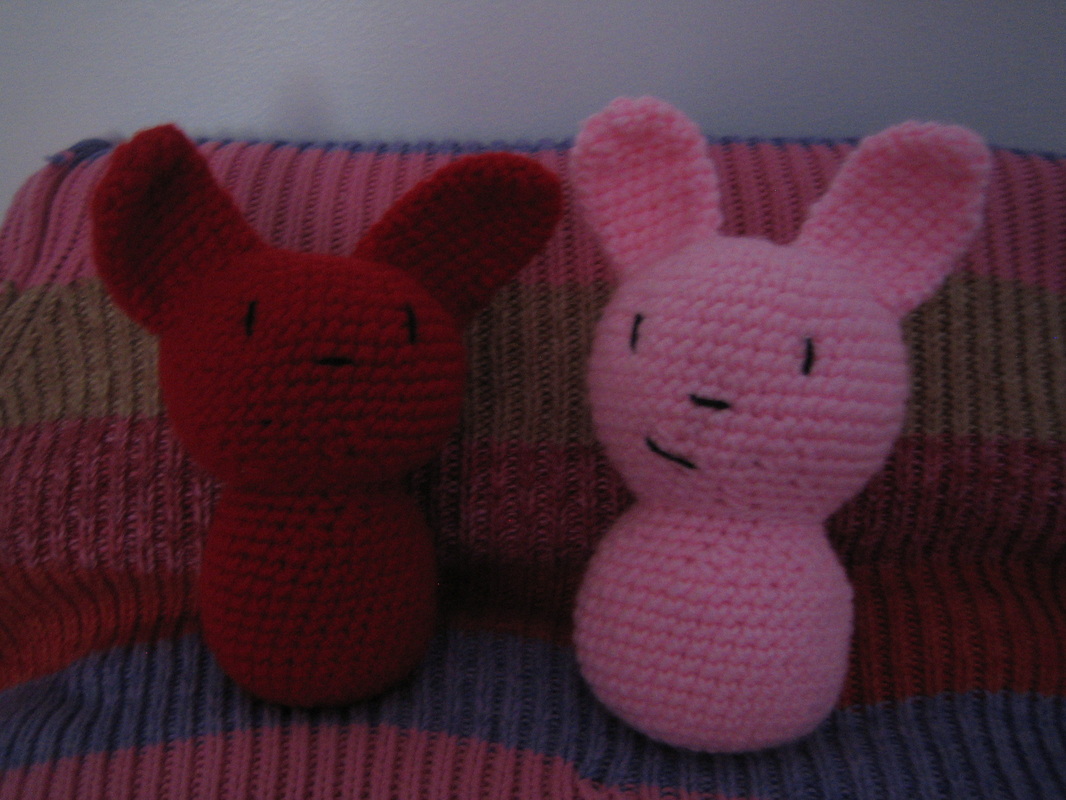
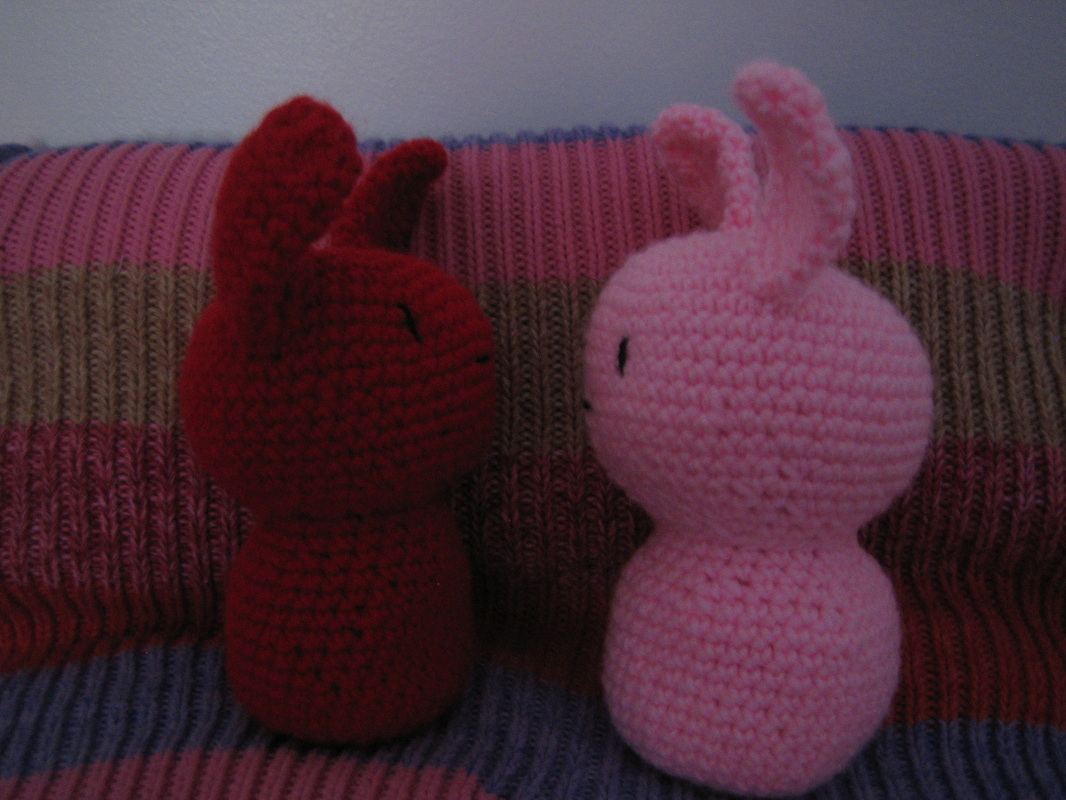
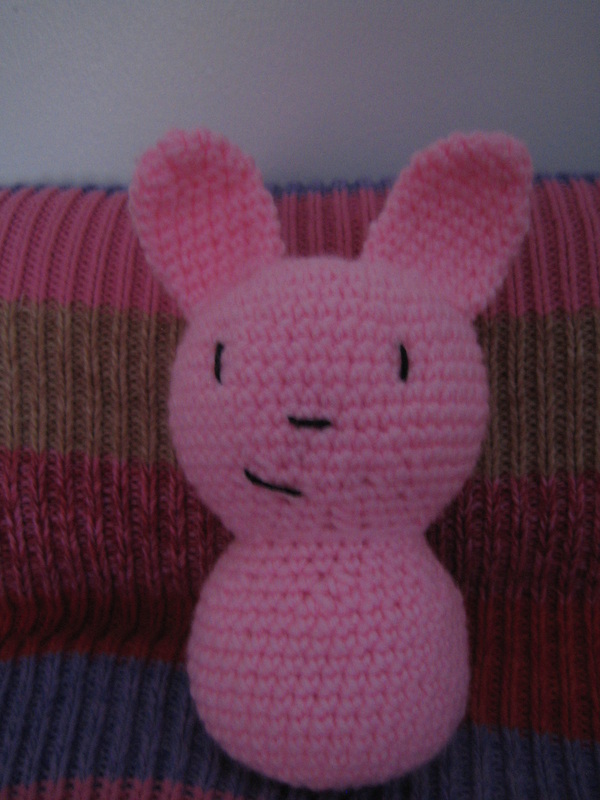
Bunny pattern
____________________________
See link
http://www.ravelry.com/patterns/library/love-bunnies
Doll shoes and Hat pattern
____________________________
Doll basket weave hat
~ ~ ~ ~ ~ ~ ~ ~ ~ ~ ~ ~ ~ ~
Ch 2, 5 dc in the 2th ch from the hook.
Row 1-2: 2 sc in each st, to the end [12]
Row 3-4: 2 dc, 1 dc in the next 2, rep from* [22]
Row 5: 2 dc, 1 dc in the next 3, rep from*
Row 6-10: start doing the basket weave st, if you have never done this st then see link http://www.bing.com/search?q=basket+weave+crochet+pattern&src=IE-SearchBox&Form=IE8SRC i would recommend looking at videos on youtube
Row 11: sc one row and Fasten off.
Crochet Pink Mary-Jane Doll Shoes
Directions for Shoes
Rnd. 1: ch6, 2sc in 2nd ch from hook, sc in next 3 ch, 3sc in next sc, working down back loops, sc in next 4 ch, join with slst to beginning sc. 12sc
Rnd. 2: ch1, sc in first sc, 2sc in next sc, sc in next 3 sc, 2sc in next sc, sc in next sc, 2sc in next sc, sc in next 3 sc, 2sc in next sc, join to beginning sc. 16sc
Rnd. 3: ch1, sc in first sc, 2sc in next 2 sc, sc in next 3 sc, 2sc in next 2sc, sc in next sc, 2sc in next 2 sc, sc in next 3 sc, 2sc in next 2 sc, join with slst to beginning sc. 24sc
Rnd. 4: ch1, working in back loops, sc in each sc around, join with slst to beginning sc. 24sc
Rnd. 5: ch1, sc in each sc around, join with slst to beginning sc. 24sc
Rnd. 6: ch1, sc in first 8 sc, scdec over next 2 sc (4 times), sc in next 8 sc, join with slst to beginning sc. 20sc
Rnd. 7: sc in each sc around, join with slst to beginning sc, ch1. 20sc
Rnd. 8: ch18, slst in first sc, ch1, slst in 18 ch, join with slst to beginning sc of previous rnd, fasten off.
Pattern from http://cobblerscabin.wordpress.com/happy-hookin/american-girl-sun-dress-set/
Any problems with the pattern; Email me [email protected]
Craft for the month of Jan 2013
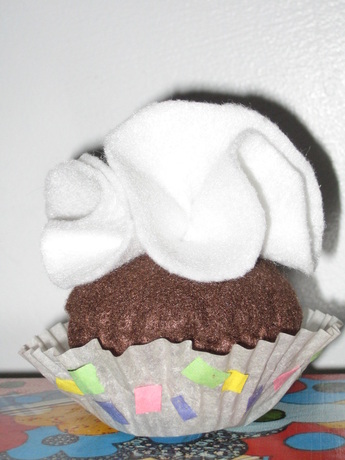
Felt Cupcake
Pattern from http://smashedpeasandcarrots.blogspot.com/2009/11/felt-cupcake-and-frosting-tutorial.html
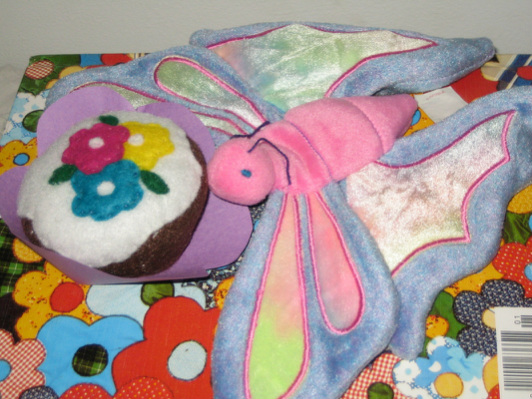
Craft for the month of Nov 2012
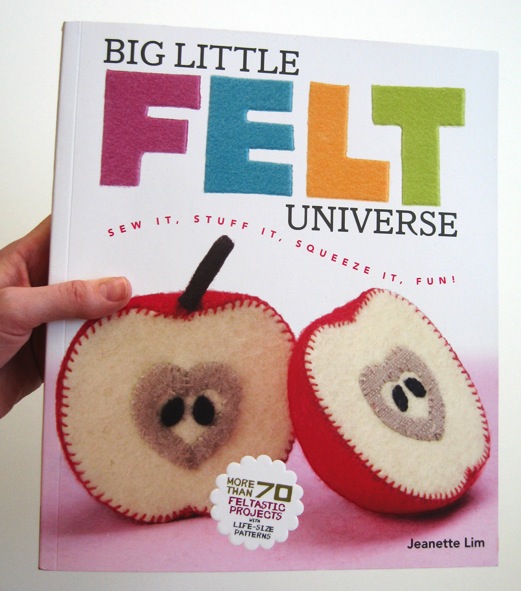
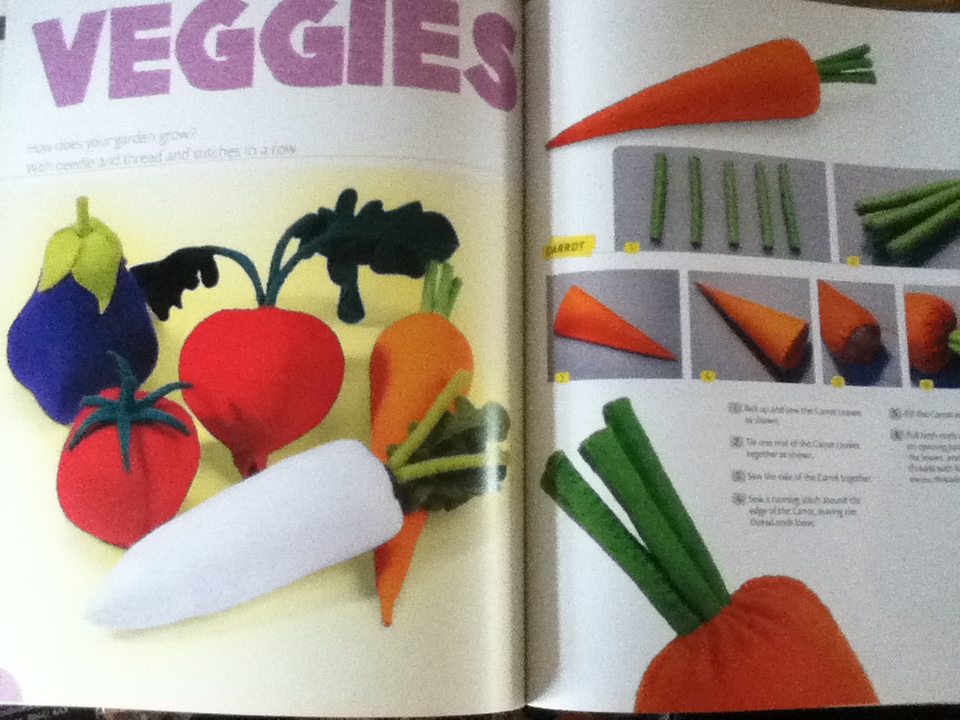
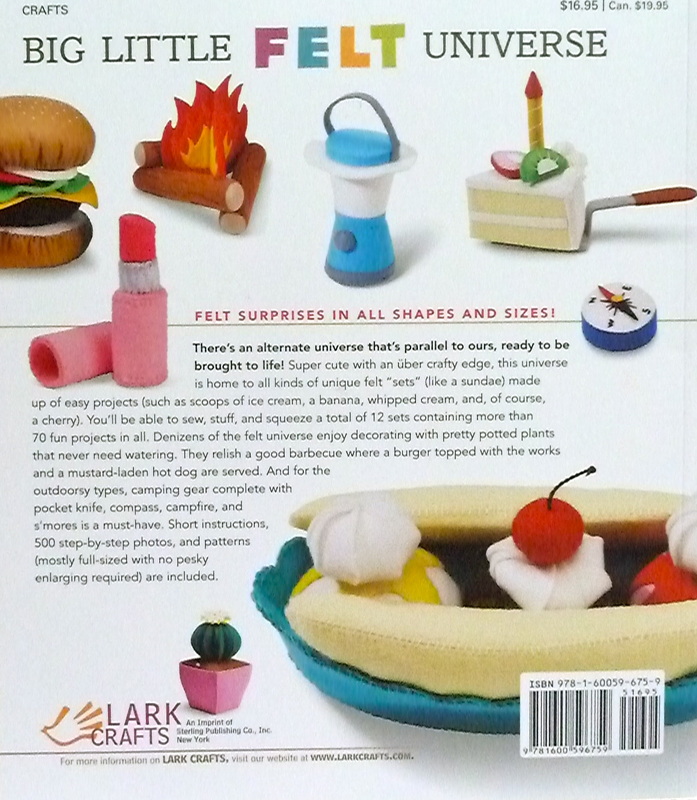
I got this pattern from the Big Little Felt Universe Book

Craft for the month of Aug-Sep 2012
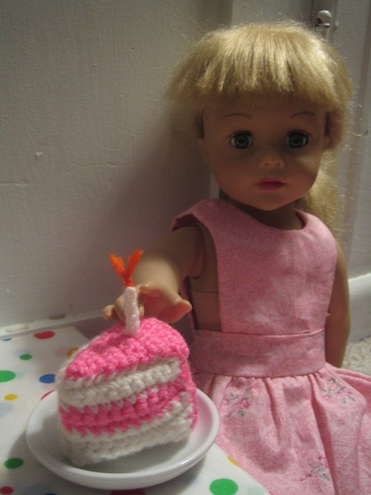
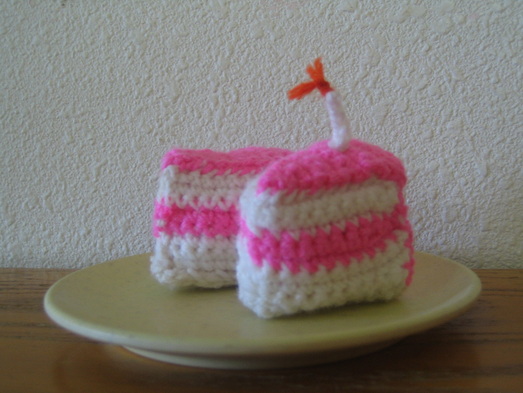
Crocheted cake slice for a 18'' doll
Directions
Side (Make 2):
Row 1: With white ch 11, sc in the 2th ch from the hook and in ea across turn (10 sc)
Row 2-4: Ch 1 sc across, do the same for 2 rows (10 sc)
Row 5-7: Switch to pink turn, ch 1 and sc for 3 rows (10 sc)
Row 8-10: Switch to white turn, ch 1 and sc for 3 rows (10 sc)
Finish off _______________________________________________________________________
Bottom
Row 1: With white, ch 2, two sc in the 2th ch from the hook turn
Row 2: Ch 1, sc 2 in ea
Row 3: Ch 1, sc 1, sc 2 in the next (3 sc) turn
Row 4: Ch 1, sc 3. turn
Row 5: Ch 1, sc 2, and sc in the last 2 (4 sc) turn
Row 6: Ch 1, sc across. (4 sc) turn
Row 7: Ch 1, sc 3, and 2 sc in the last one. (5 sc) turn
Row 8: Ch 1, sc across (5 sc) turn
Row 9: Ch 1, sc 2 in the same st, sc 4. (6 sc) turn
Row 10: Ch 1, sc 5, sc 2 in the last st. (6 sc) turn
Row 11: Ch 1, sc 2 in the 1st st, and across (8 sc) turn
Finish off
_____________________________________________________________
Top, same as bottom
Row 1: With pink, ch 2, two sc in the 2th ch from the hook turn
Row 2: Ch 1, sc 2 in ea
Row 3: Ch 1, sc 1, sc 2 in the next (3 sc) turn
Row 4: Ch 1, sc 3. turn
Row 5: Ch 1, sc 2, and sc in the last 2 (4 sc) turn
Row 6: Ch 1, sc across. (4 sc) turn
Row 7: Ch 1, sc 3, and 2 sc in the last one. (5 sc) turn
Row 8: Ch 1, sc across (5 sc) turn
Row 9: Ch 1, sc 2 in the same st, sc 4. (6 sc) turn
Row 10: Ch 1, sc 5, sc 2 in the last st. (6 sc) turn
Row 11: Ch 1, sc 2 in the 1st st, and across (8 sc) turn
Finish off
__________________________________________________________________
Back:
Row 1: Ch 10, sc in the 2h ch from the hook and in ea across
Row 2-8: Ch 1, sc across turn * rep from* for 6 rows
Finish off
__________________________________________________________________
Any problems with the pattern; Email me [email protected]
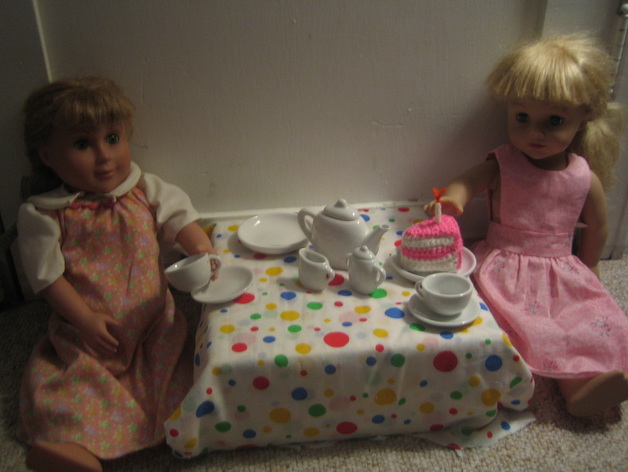
The cake is great for a tea party
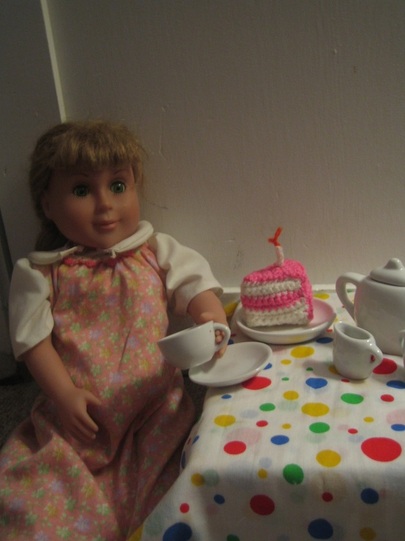

You can make different colors and cakes with candles for a doll birthday party
Craft for the month of July 2012
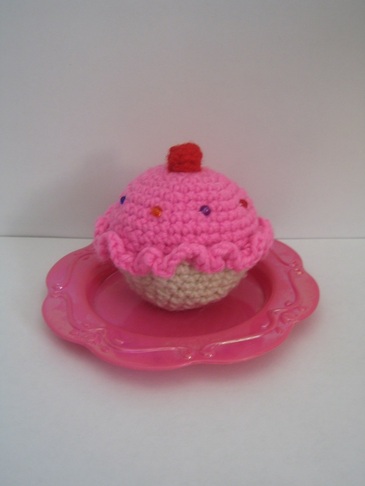
Special Stitch:
Decrease, DEC SC: Draw up a loop in next stitch, again, draw up a loop in the next stitch. [there should now be 3 loops on the hook] Yarn over hook, Draw yarn through all 3 loops on the hook. If you don't get this way to do the DEC st see link, (How to DEC crochet, See Link for step by step pic's http://crochet.about.com/library/bl_decrease.htm)
Top: Make 1
G hook, Pink yarn
Ch2
1: 6sc in second chain from hook
2: 2sc in each st around (12sc)
3: 2sc in first st, 1sc in next st repeat around (18sc)
4: 2sc in first st, 1 sc in next 2stitches, repeat around (24sc)
5: 2sc in first st, 1sc in next 3 stitches, repeat around (30sc)
6: 2sc in first st, 1 sc in next 4 stitches, repeat around (36sc)
7: 1sc in each st around. (36sc)
8: 1sc in each st around (36sc)
9: 1 sc in each st around (36sc)
10: 1sc in each st around (36sc)
11: Working in front loops only, 3sc in each st around (108sc), sl st to beginning sc
Fasten off, weave in ends
Bottom: Make one
G hook, White yarn
1: Join with a sl st to back loop of 'Top cupcake', sc in each st around in back loops only.
2: Sc in each st around
3: Dec sc over first 2 stitches, 1 sc in next 4 stitches, repeat around
4: 1sc in each stitch around
5: Dec sc over first 2stitches, 1 sc in next 3 stitches, repeat around
6: 1sc in each stitch around
7: Dec sc over first 2 stitches, 1sc in next 2 stitches, repeat around
STUFF with poly-fiber fill
8: Dec Sc over first 2 stitches, 1sc in next stitch, repeat around
9: Working in back loops only, sc in each stitch around
10: Dec sc over first 2 stitches, Dec sc until closed
Fasten off, weave in ends
My 1st Crocheted Cupcake (just made it yesterday) so enjoy the free pattern...
Any problems with the pattern; Email me [email protected]
Craft for the month of June 2012
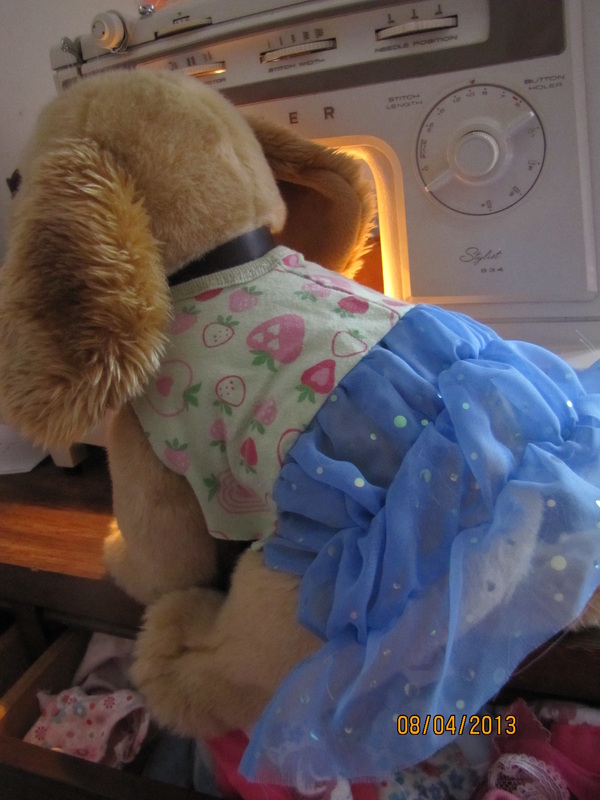
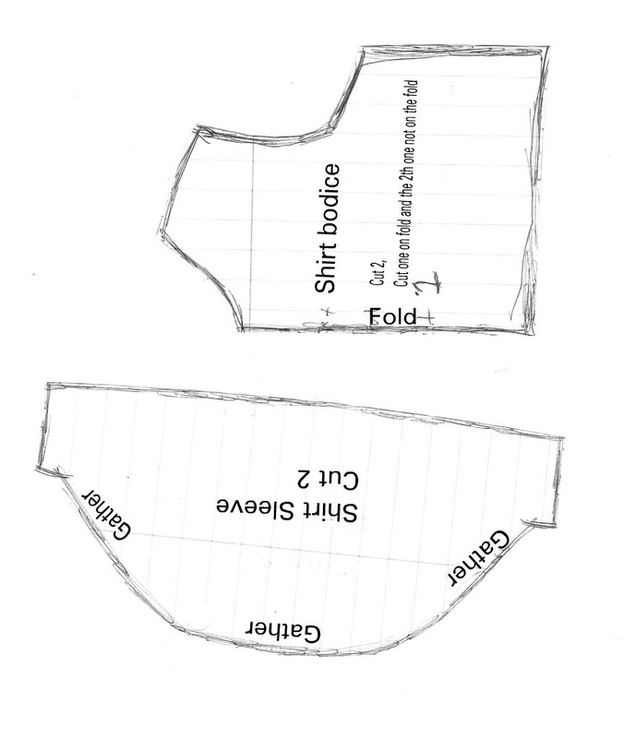
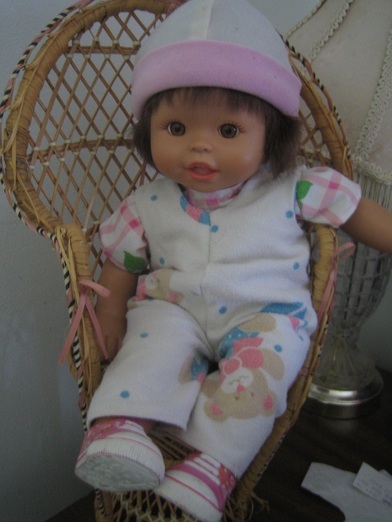
15 inch doll overalls/baby doll overalls
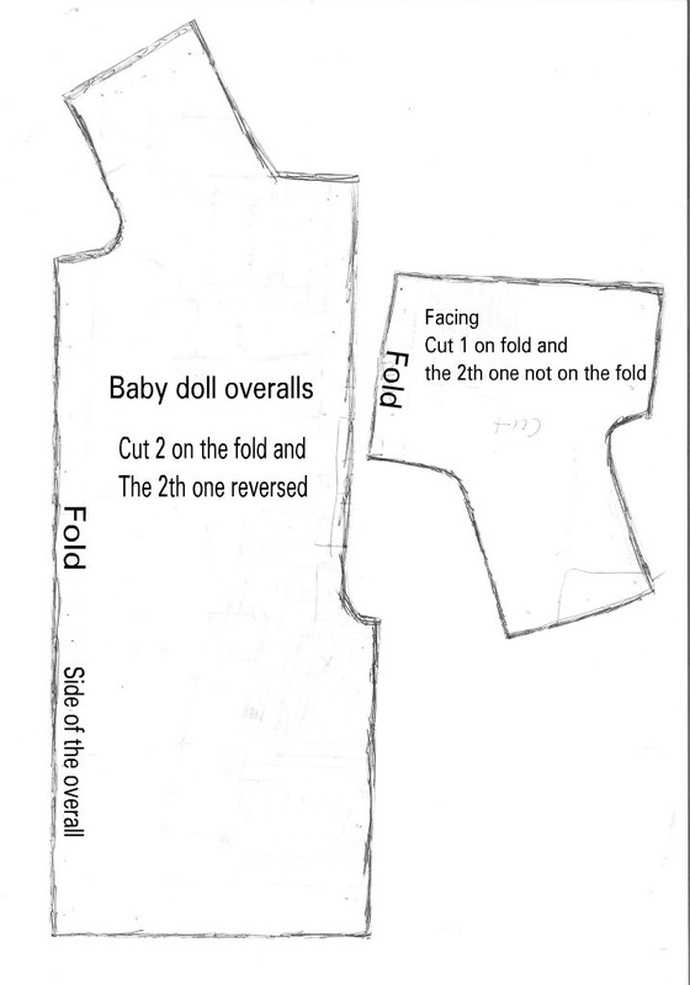
To get the pattern.
Just draw it off the screen.
Any problems with the pattern;
Email me [email protected]
Just draw it off the screen.
Any problems with the pattern;
Email me [email protected]
Craft for the month of May 2012
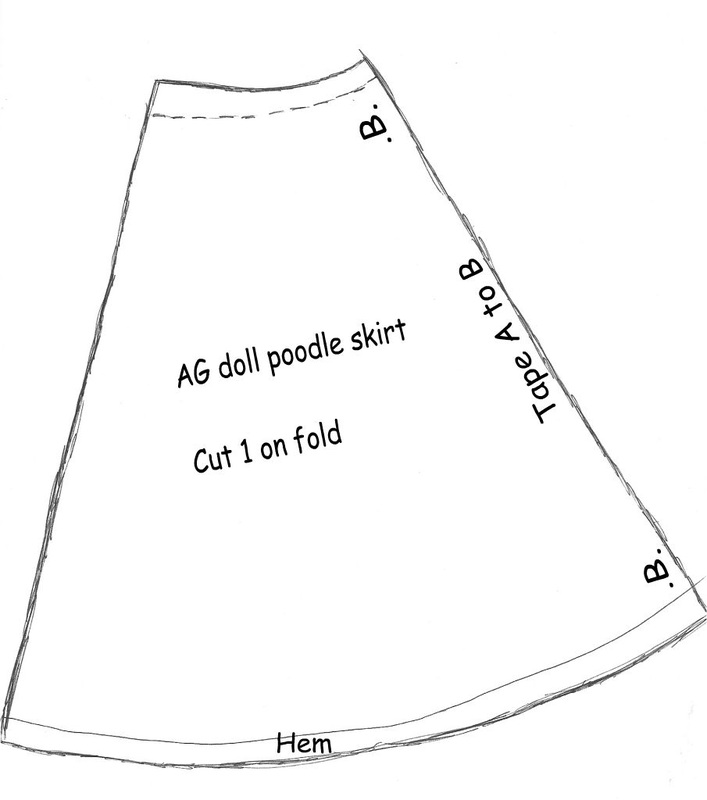
AG doll poodle skirt

To get the pattern.
Just draw it off the screen.
Any problems with the pattern; Email me [email protected]
Just draw it off the screen.
Any problems with the pattern; Email me [email protected]
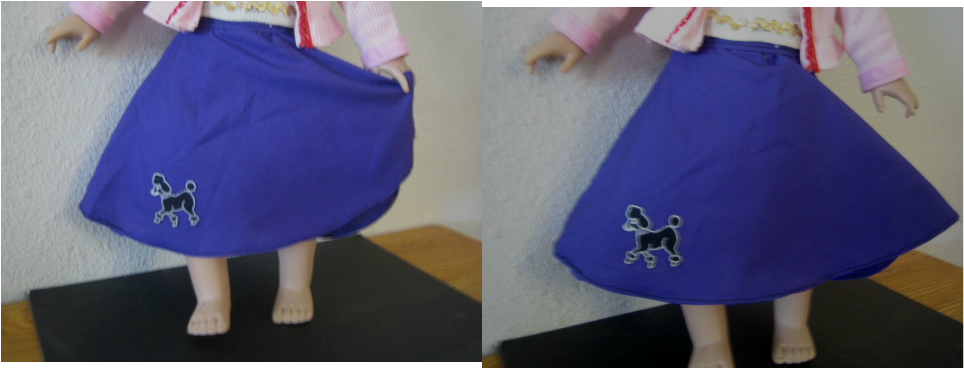
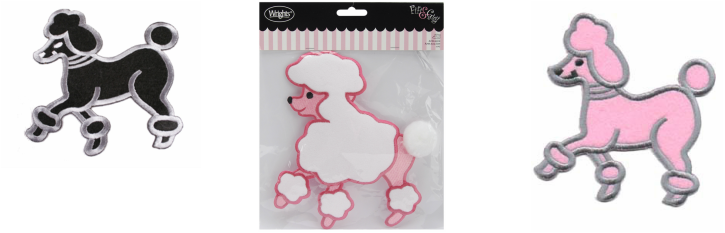
Iron on poodle's
Craft for the month of April 2012
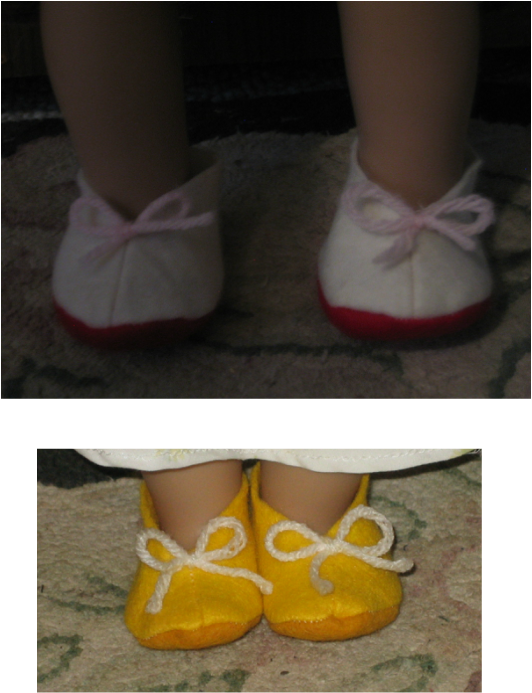
American Girl doll felt shoes
~~~~~~~~~~~~~~~~~~~~~~~~~
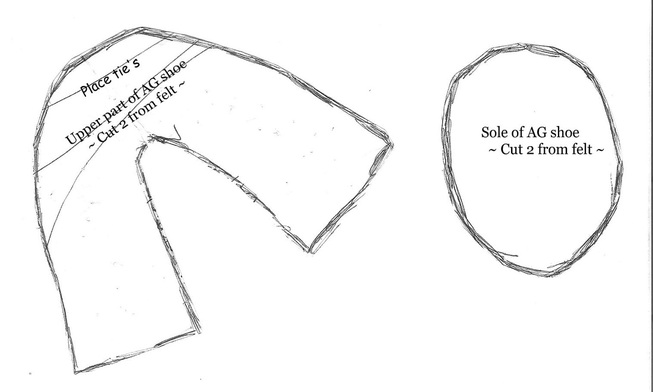
To get the pattern, just draw it off the screen.
Any problems with the pattern; Email me [email protected]
Any problems with the pattern; Email me [email protected]
Craft for the month of March 2012
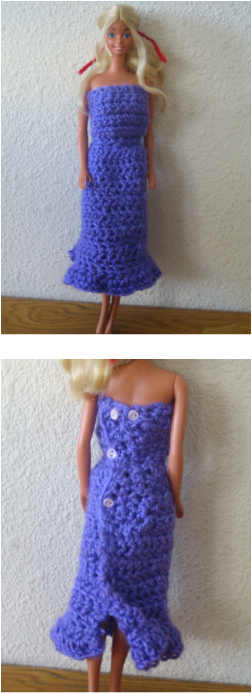
Crocheted Barbie Dress Patterns
~~~~~~~~~~~~~~~~~~~~~~~~~~~~~~
Row 1: Ch 25, Sc in the 2nd ch from the hook.
Row 2-8: Sc to the end ch 1 turn.
Row 9: Sc in the next, Dec in the next: Rep to the end. Ch 1 turn.
Row 10: Dec to the in each ch. Ch 1 turn.
Row 11: 2 sc in each ch. Rep to the end. Ch 2 turn
Row 12-20: Hdc in each ch to the end. ch 2 turn
Row 21-25: Dc to end. Ch 3 turn
Row 26: 2 Dc in each ch. Rep to end
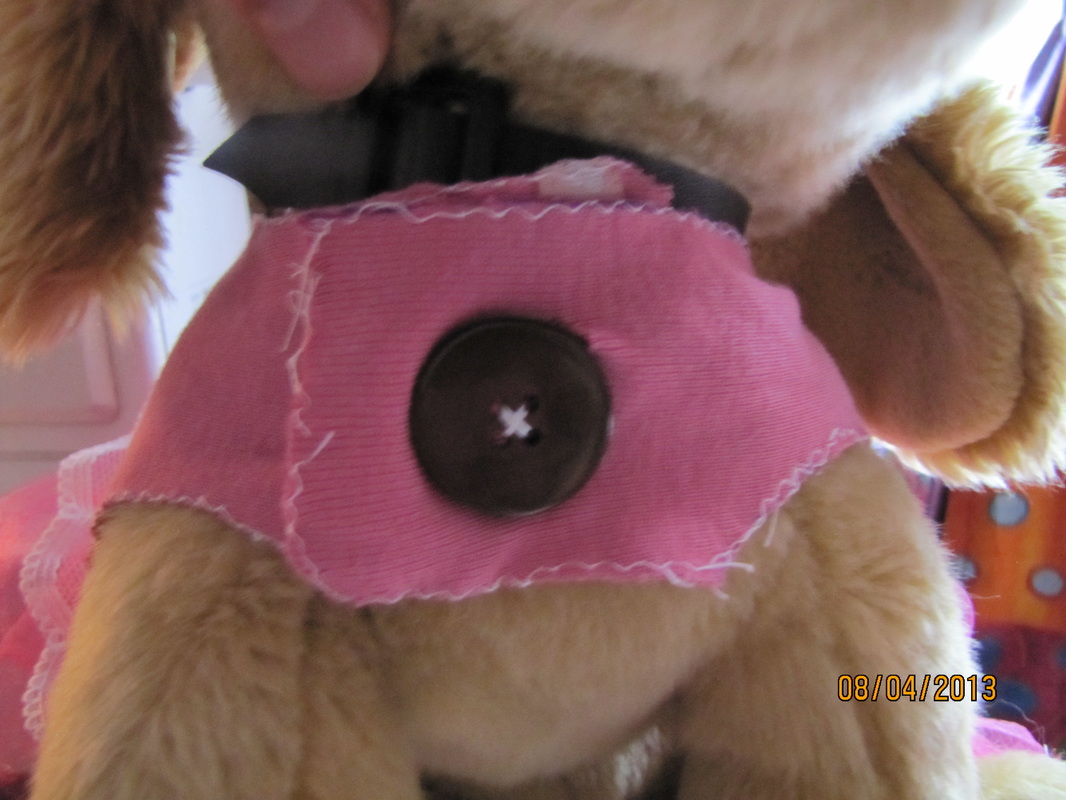
When Done Put Buttons (See Pic on the left)
Any problems with the pattern; Email me [email protected]
Row 2-8: Sc to the end ch 1 turn.
Row 9: Sc in the next, Dec in the next: Rep to the end. Ch 1 turn.
Row 10: Dec to the in each ch. Ch 1 turn.
Row 11: 2 sc in each ch. Rep to the end. Ch 2 turn
Row 12-20: Hdc in each ch to the end. ch 2 turn
Row 21-25: Dc to end. Ch 3 turn
Row 26: 2 Dc in each ch. Rep to end
When Done Put Buttons (See Pic on the left)
Any problems with the pattern; Email me [email protected]
Crocheted White And Pink Barbie Dress
~~~~~~~~~~~~~~~~~~~~~~~~~~~~~~~~~~~~
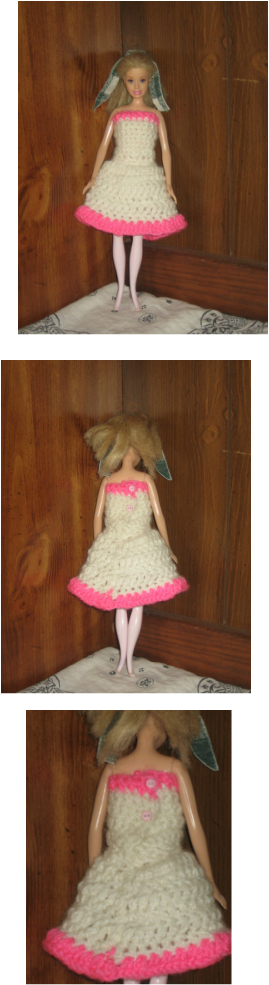
Row 1-2: With pink sc to the end turn and join on white
Row 3-11: With white crochet 9 rows
Row 11: Dec to the end
Row 12: Three sc in each st, ch 3 turn
Row 13-19: Dc in each st (ch 3 at every end of row)
Row 20: Join pink, two Dc in ea st
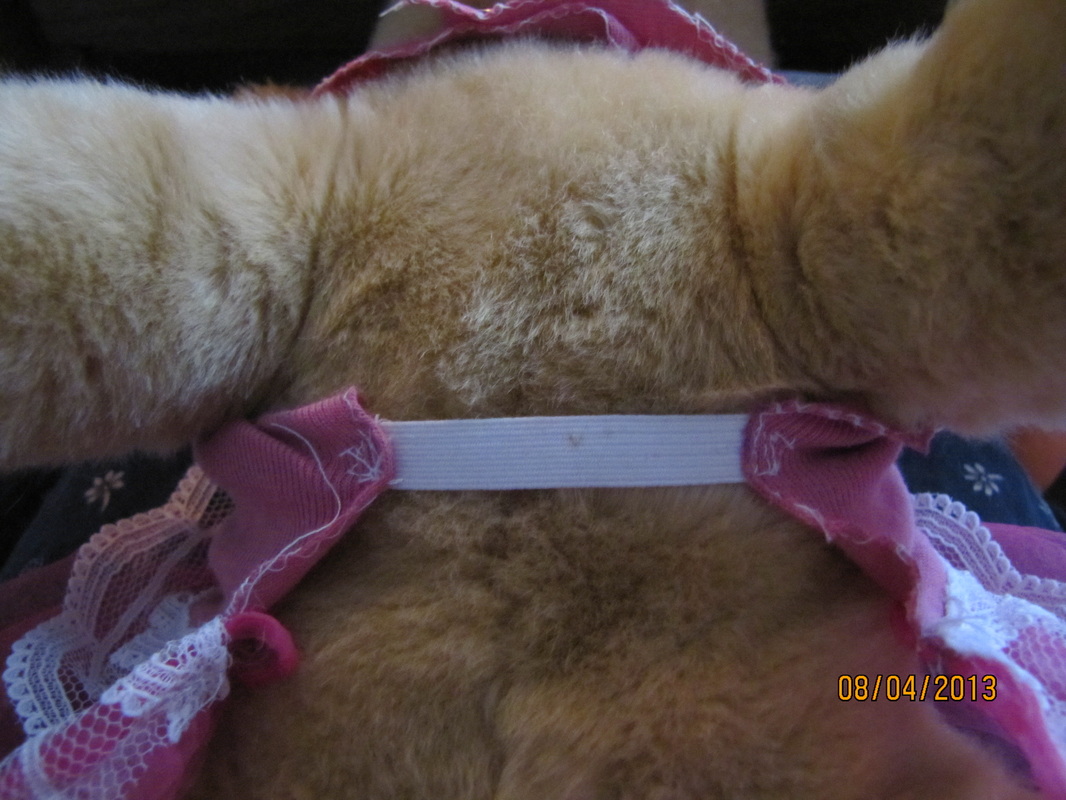
When Done fold dress in half and crochet or sew with yarn needle (Start at the waist)
Put 2 or 4 buttons on the back of the bodice (See pic)
